DIY Casting Furnace
[Disclaimer: I am by no means a casting expert and this is a dangerous DIY activity. Think critically and be safe!]
Introduction
After my first major DIY project of building my own coffee table, I figured an appropriate step up in DIY-ing was casting bronze in a homemade furnace at 2000+°F. I was talking through the idea with some work friends, and one offered me some scrap Nickel Aluminum Bronze he had, and another offered me an old air compressor tank to use as the furnace body, so I had no choice but to seriously take on the project. In this post I’ll primarily be talking about the furnace build and 1st casting attempt. I have not dialed in the casting yet, so I’ll provide an update on that later.
The goal for the furnace is simple: melt metal to turn into a different shape of metal. Most DIY casting furnace builds I found online were propane burning, so that’s what I decided to build. As the project went on, I learned about a handful of alternatives. A strong alternate architecture I could’ve chosen would be coal or charcoal burning, but I was making good progress with the propane design, so I saw no reason to change my plan. Propane mixed with ambient air burns at 3600°F and nickel aluminum bronze melts around 2000°F. Everything after that was an insulation problem: keep the heat in the hot zone to melt faster, burn less propane, and get the metal hotter to allow for some cooling during pouring operations.
Furnace Build
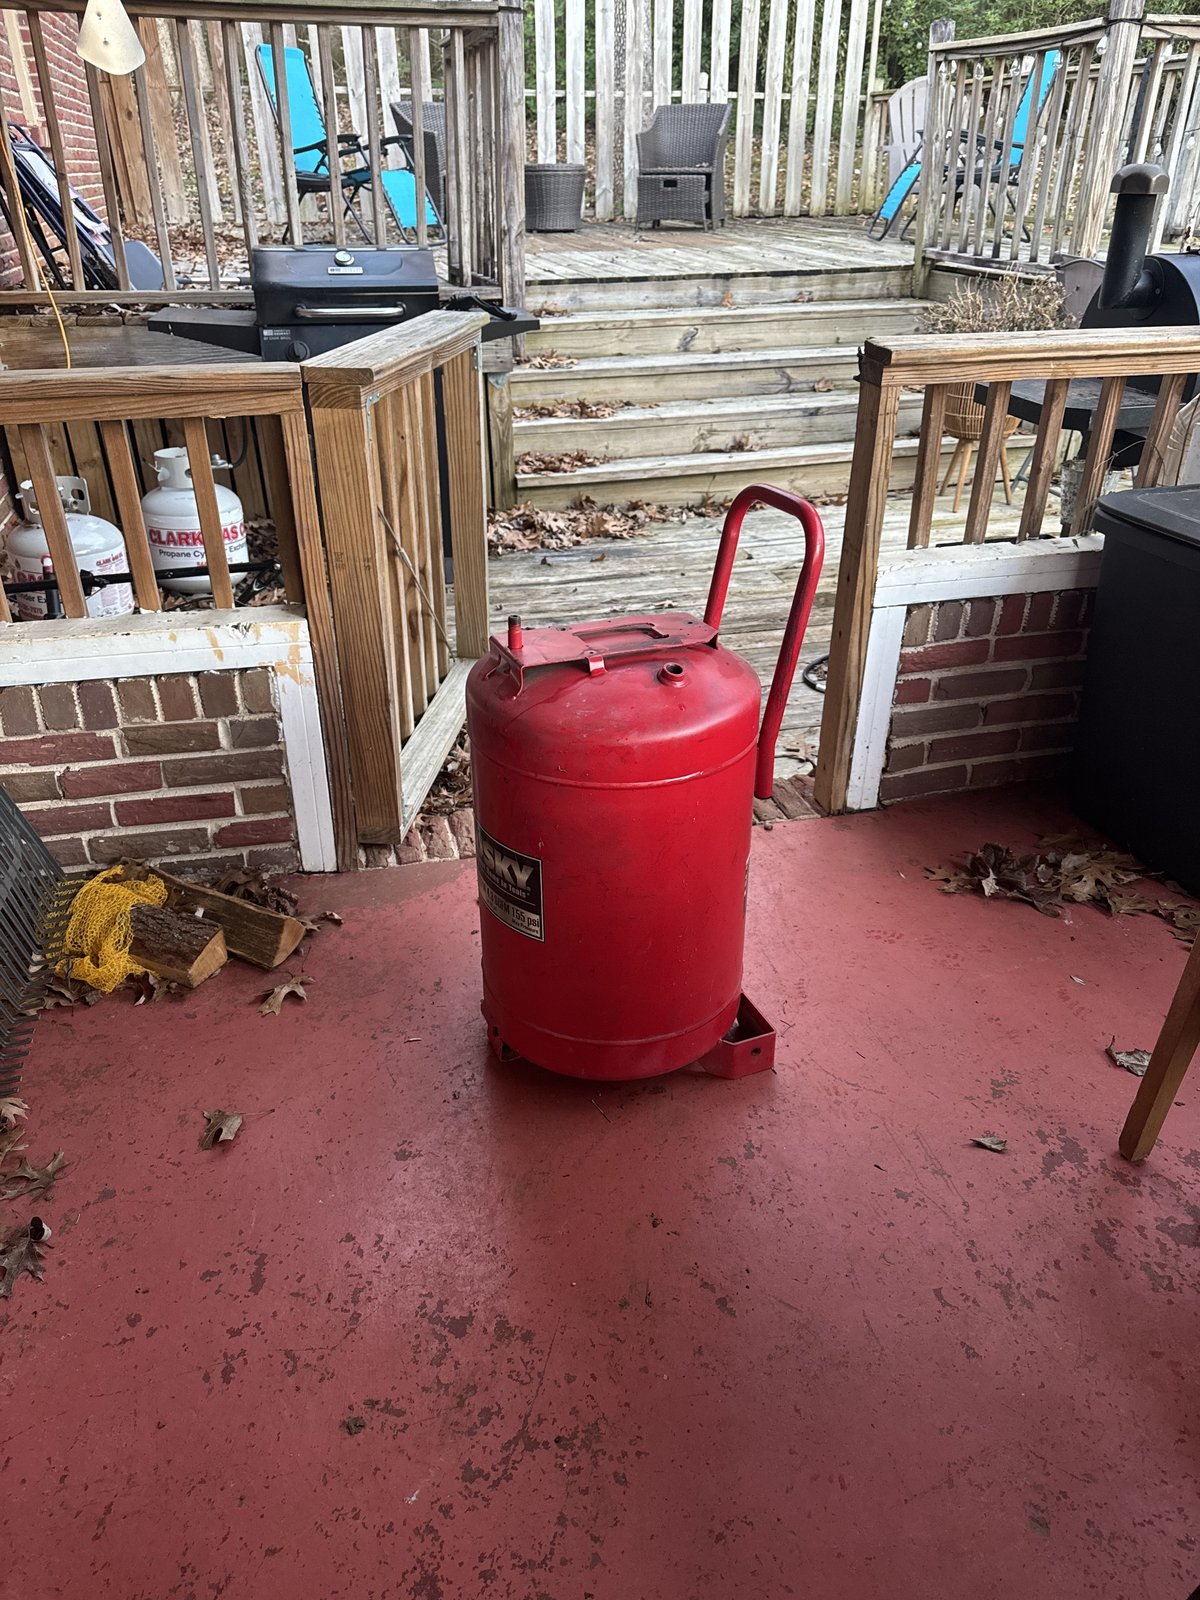
I started with the steel air compressor tank from my coworker. This would serve as the furnace body. I started by removing the non-metallic components on the bottom of the tank (wheels and rubber stopper). Fortunately, the tank was relatively level without these. I then filled the entire tank with water to remove any oil mist or unknown flammable vapors lingering inside the tank. This was less a concern for furnace operation, and more about sparks from the angle grinder. A fire from this situation was unlikely, but the tank had been sitting in a shed for over a year, and it only took about 5 minutes and a backyard hose to fill & drain the tank.
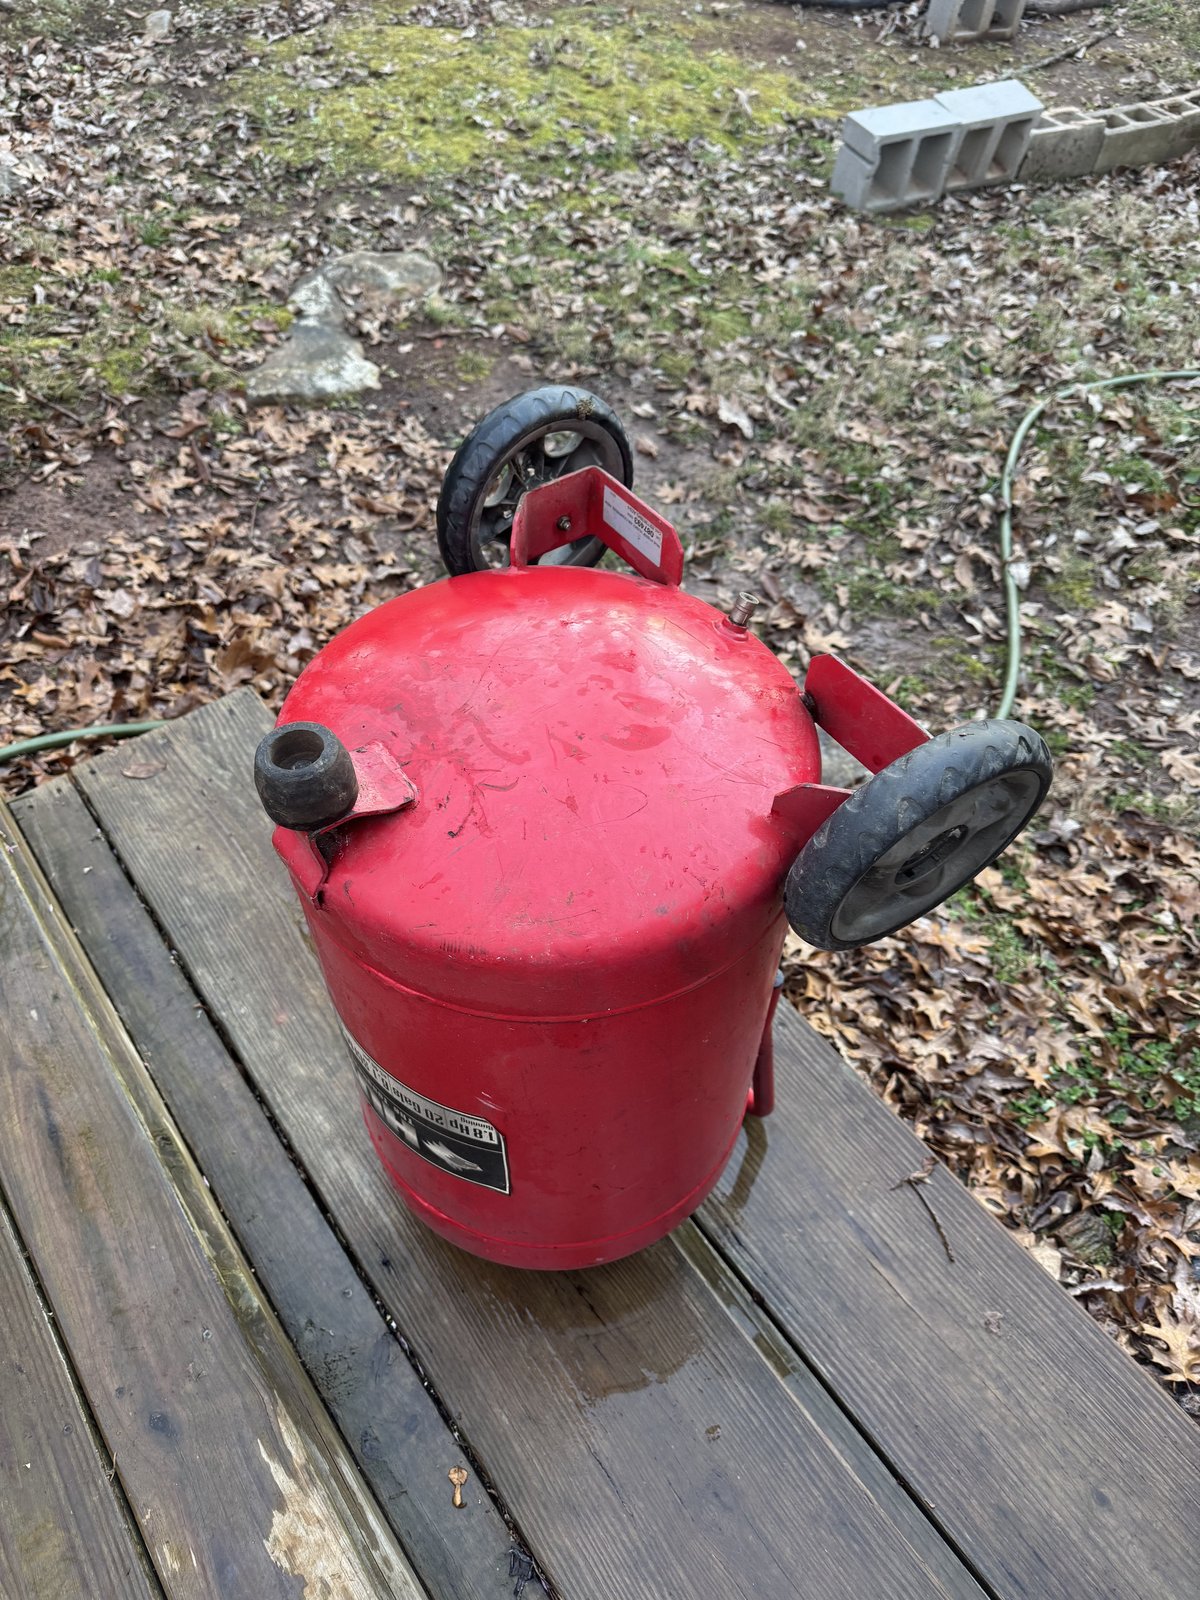
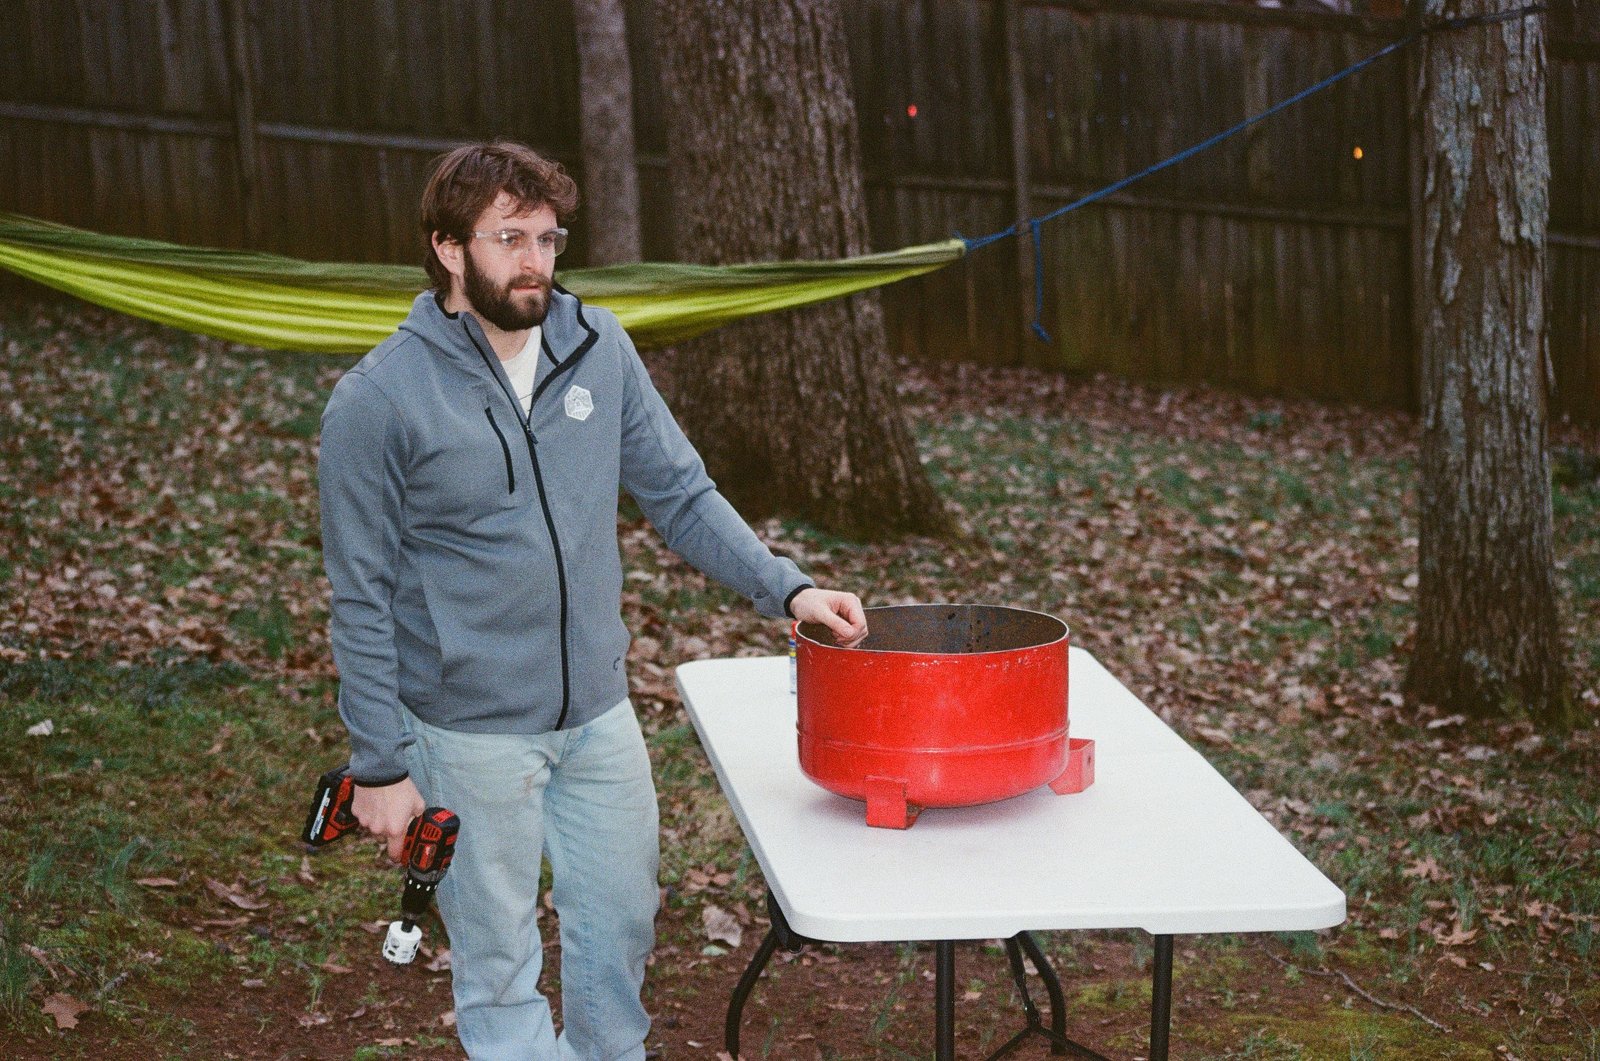
I then went to town with the angle grinder. I bought an angle grinder at Harbor Freight for this project. Multiple people (including another customer at the store) told me to remove the handle and guard as soon as I buy the grinder. I thought it was funny that seemingly all Harbor-Freight-angle-grinder users have converged on this course of action, but I found it unnecessary and unsafe and left them both on. With the grinder, I first removed some ancillary metal pieces on top of the tank used for supporting the air compressor. I used a cut-off wheel then cleaned up the sharp edges with a low-grit flap disc.
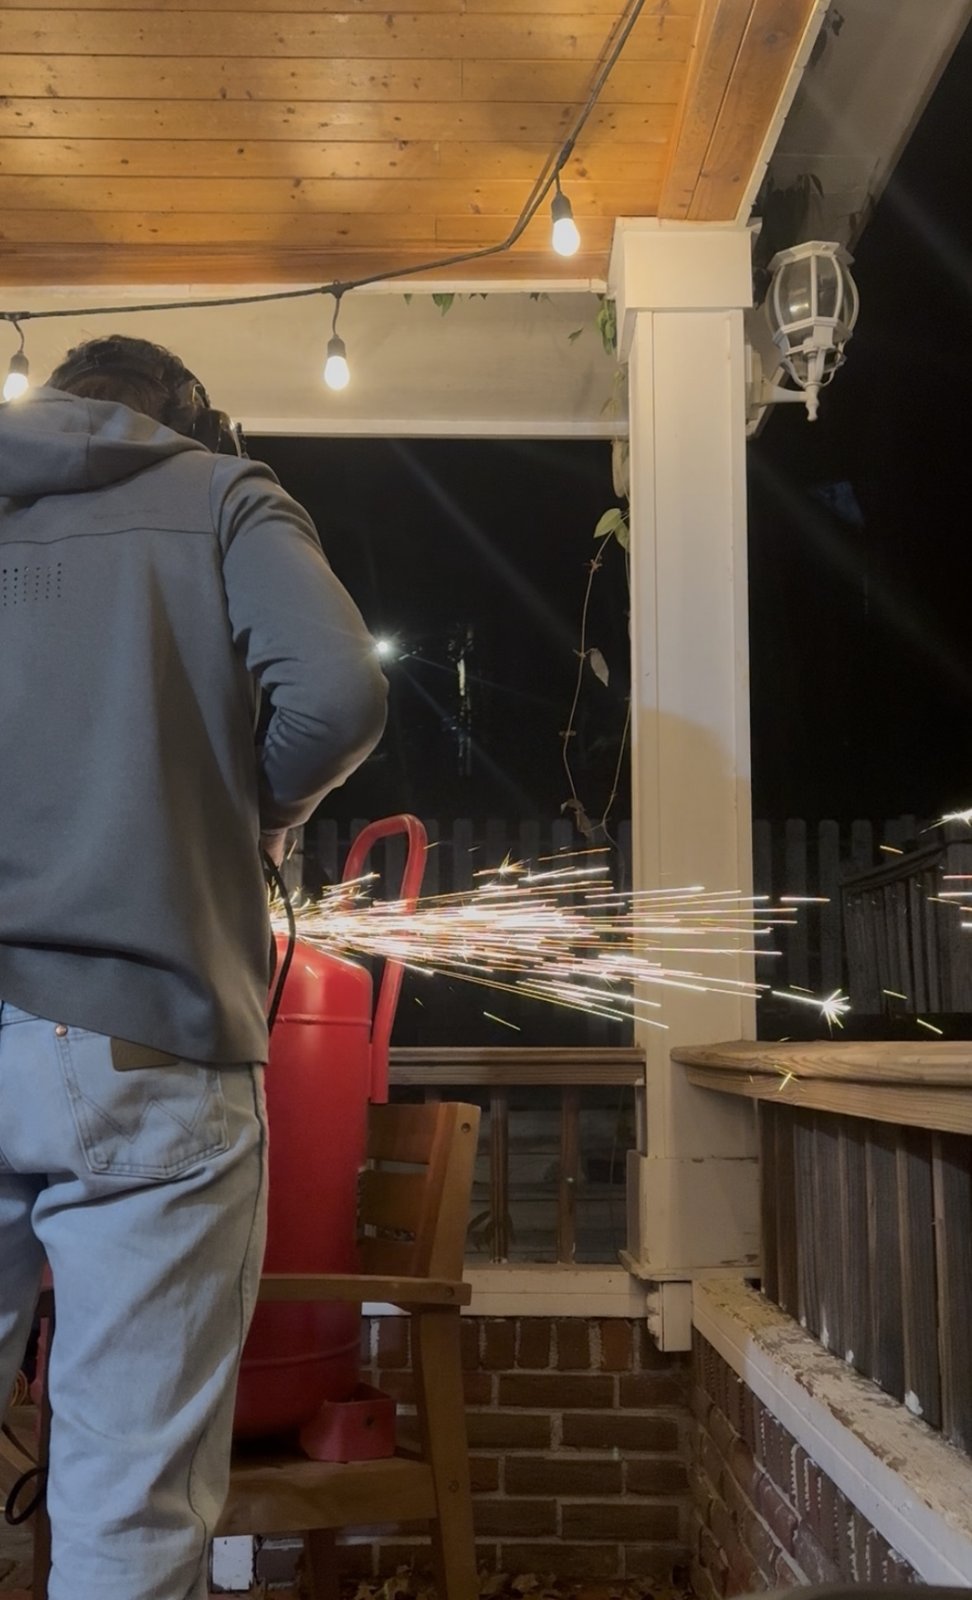
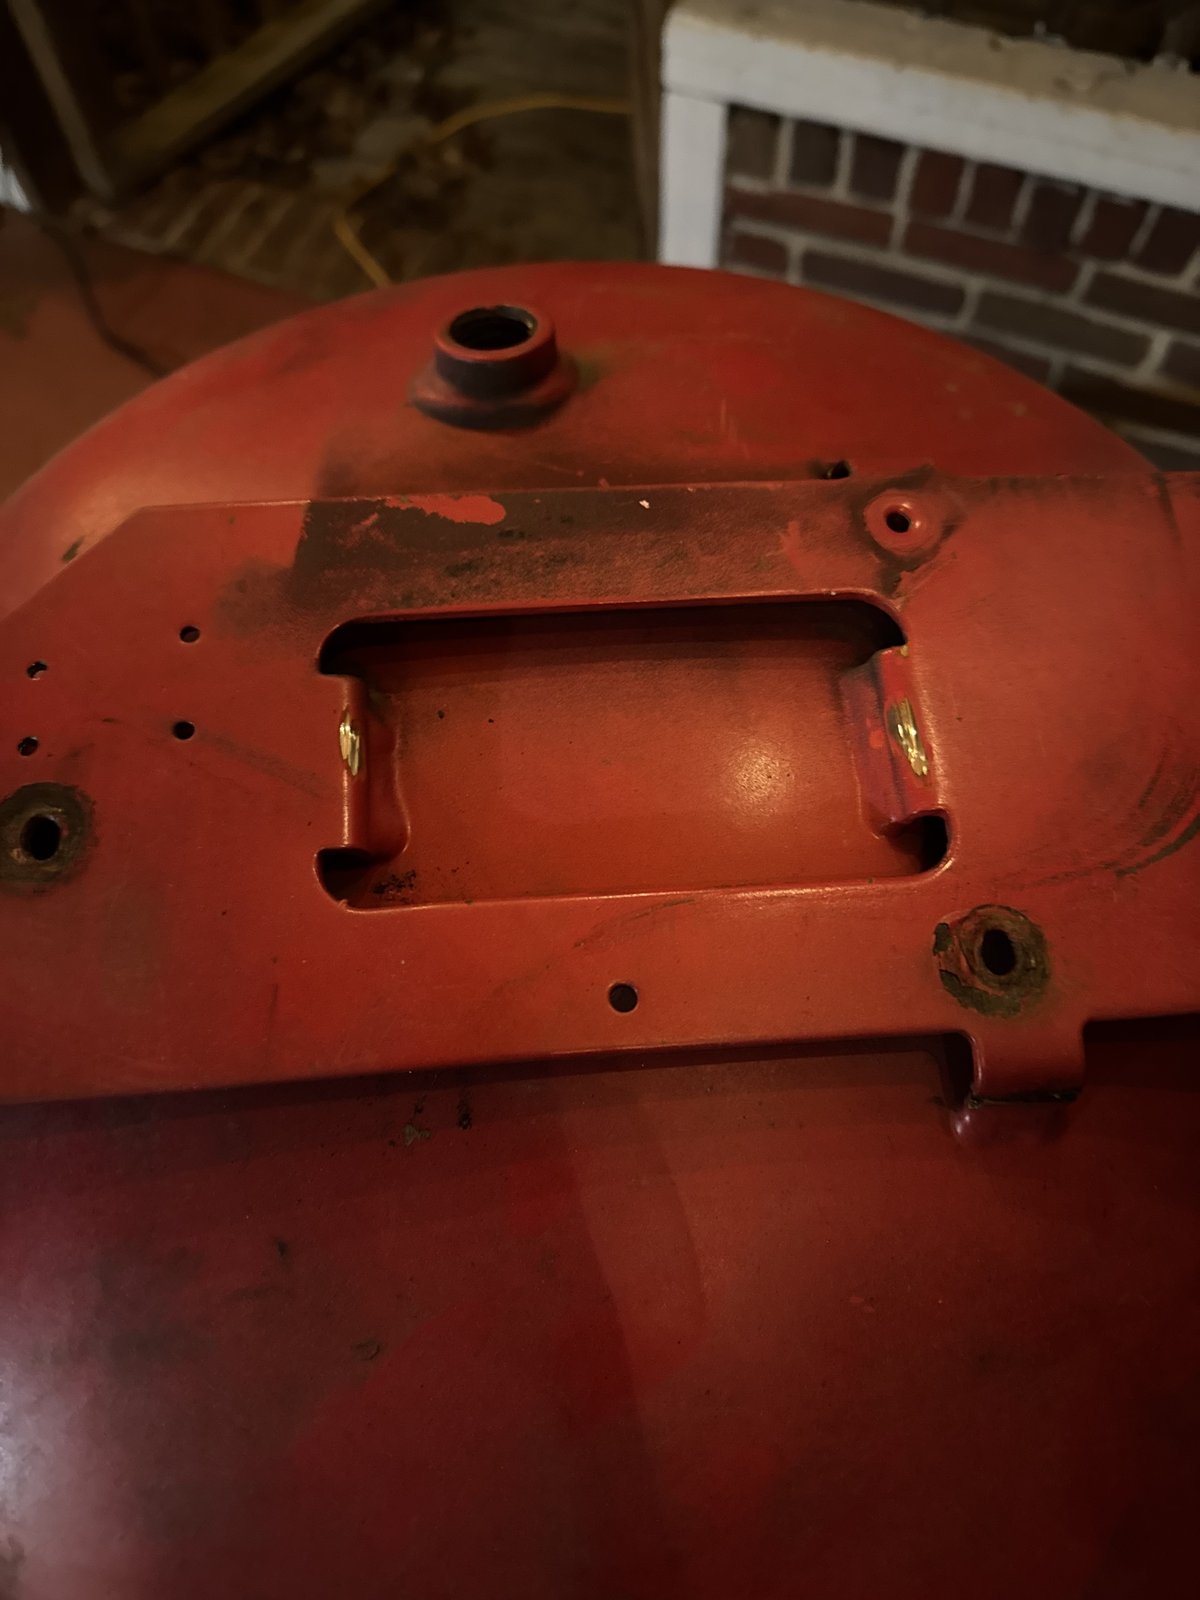
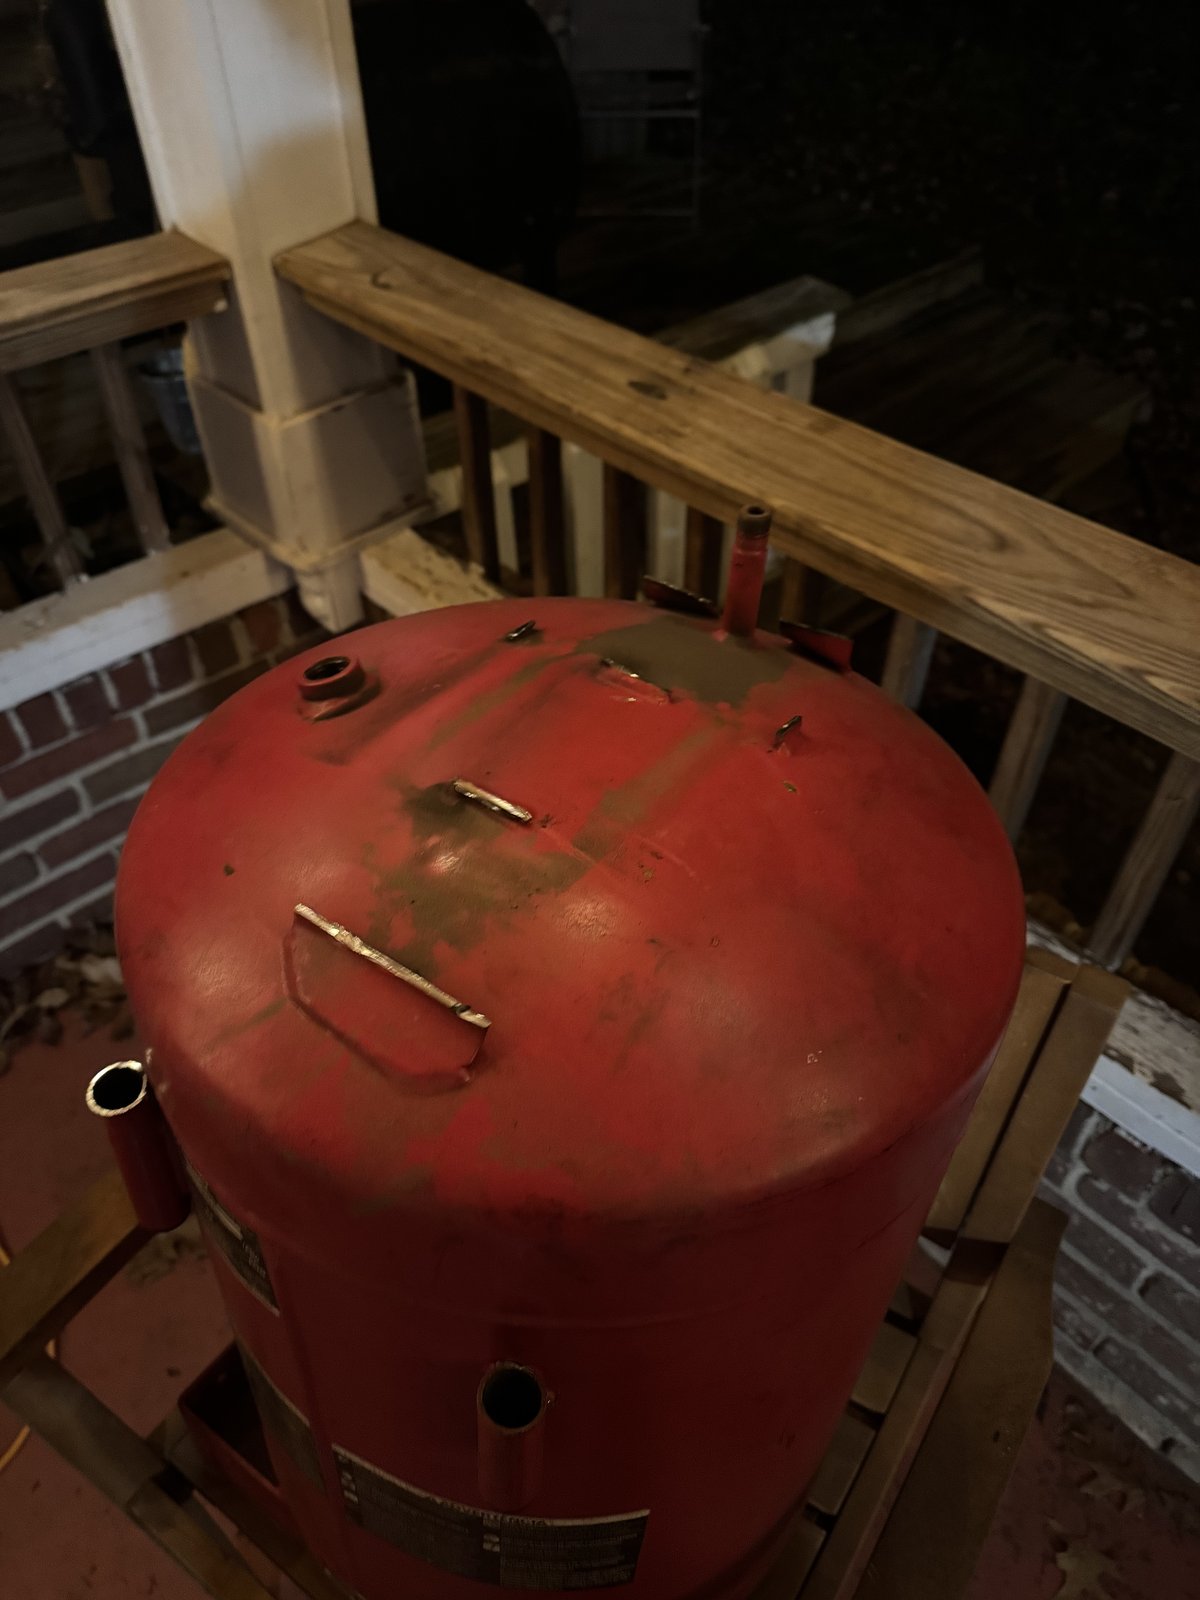
I then began the long work of performing two circumferential cuts around the main barrel section of the tank. The first cut was near the top of the tank body. The top would serve as the furnace lid. The second cut was a bit lower than the halfway point of the tank, in order to cut out the center barrel to throw away and therefore shrink the overall furnace volume. Like I said before, keeping heat in the hot zone was my biggest concern, and I wanted the internal volume to be as small as possible.
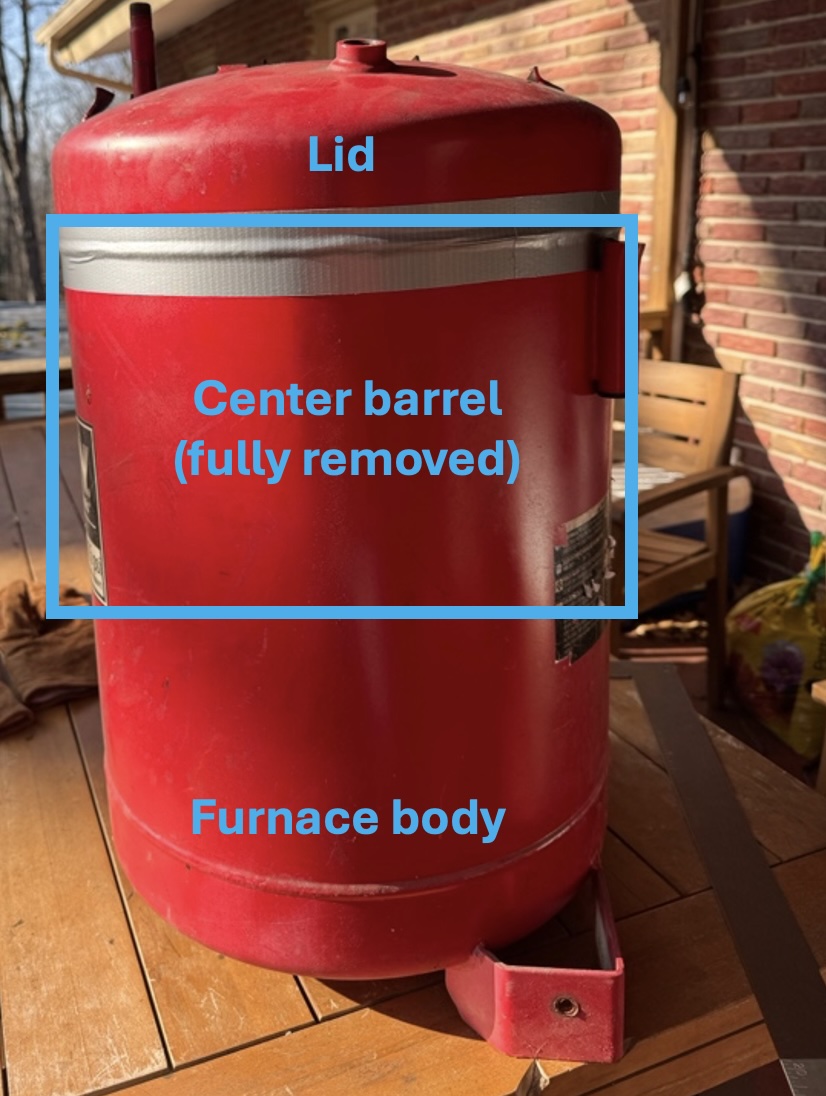
I definitely learned some angle grinding lessons on these cuts. I used duct tape as my guide, which worked well. I worked different parts of the cut instead of doing a full circle and left small supports to be removed last to prevent any pinching of the wheel between the lid and the barrel. Some areas that didn’t cut quickly (likely due to my form) became work-hardened, which increased the amount of linger time for the cut which continued to make the work-hardening worse. I found that doing a “scoring pass” over a length of roughly 2” that cut partially into the material as a guide and then a second pass that fully cuts through the tank wall was the fastest & cleanest way to work through the material. I wore over-ear hearing protection, safety glasses, and a face shield. I also wore leather gloves for the sparks flying back onto my hands.
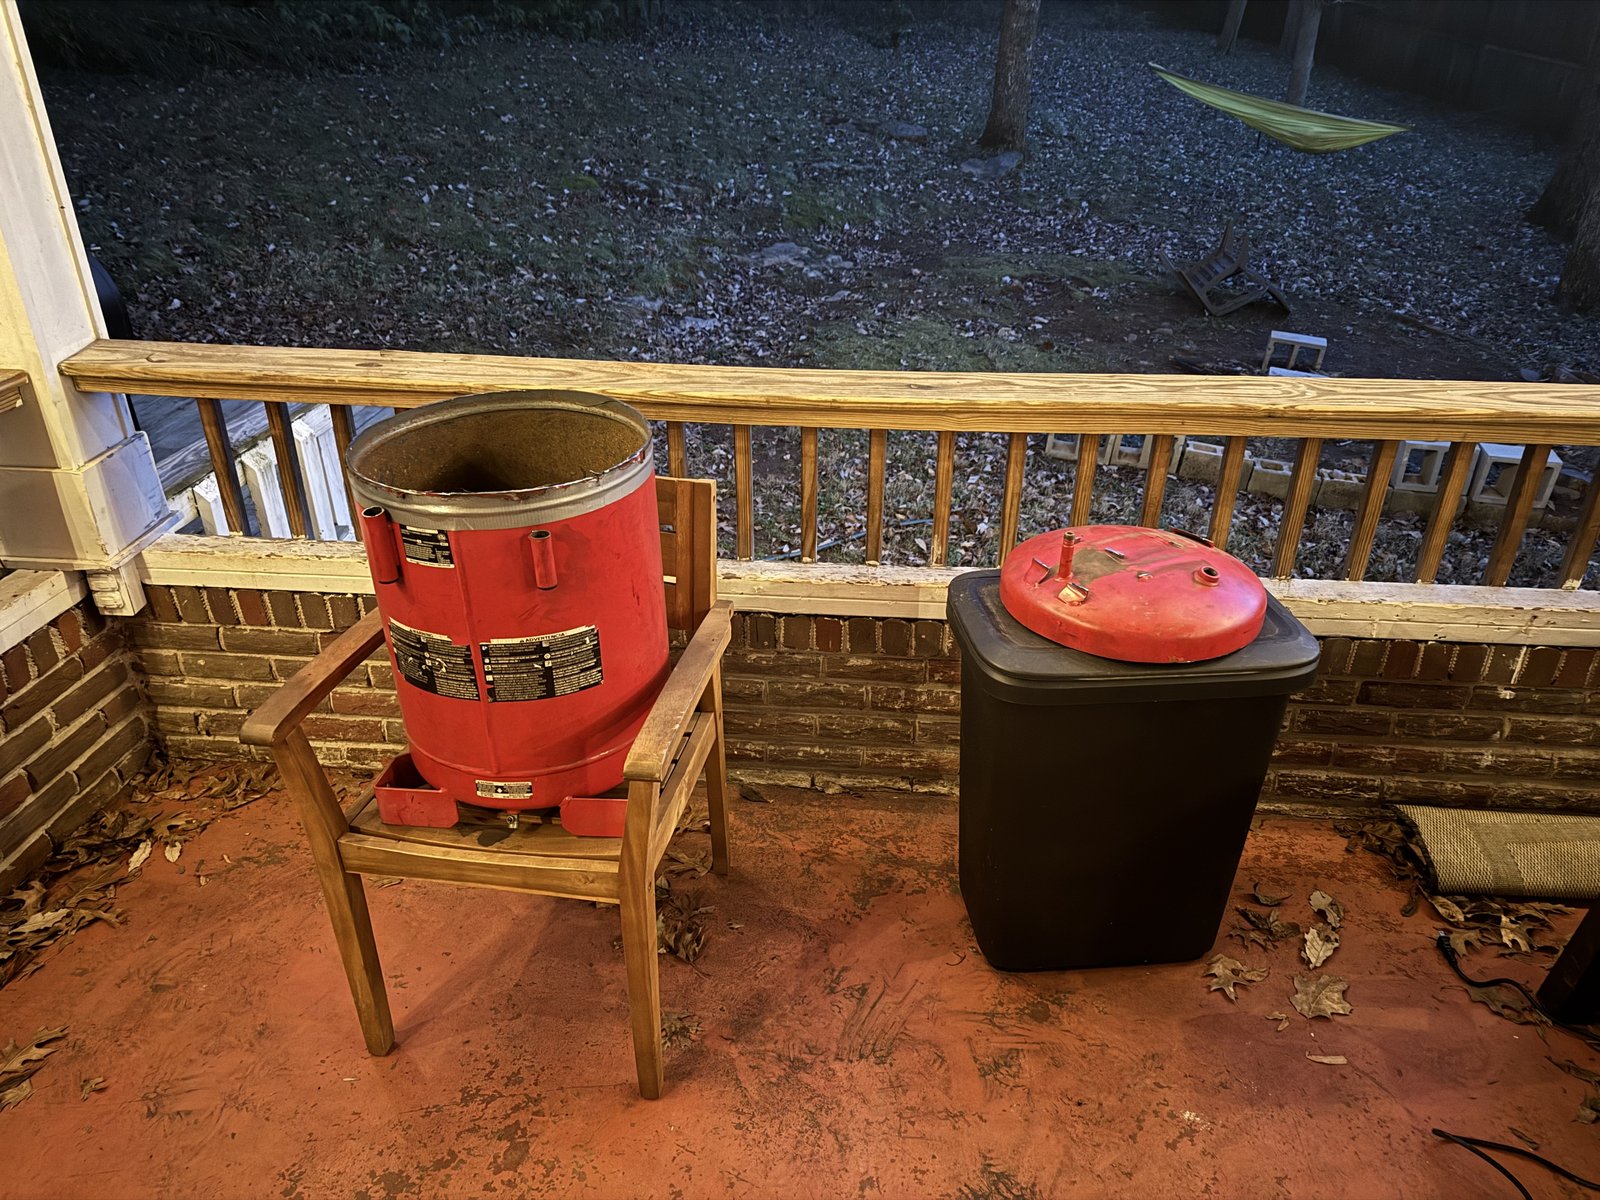
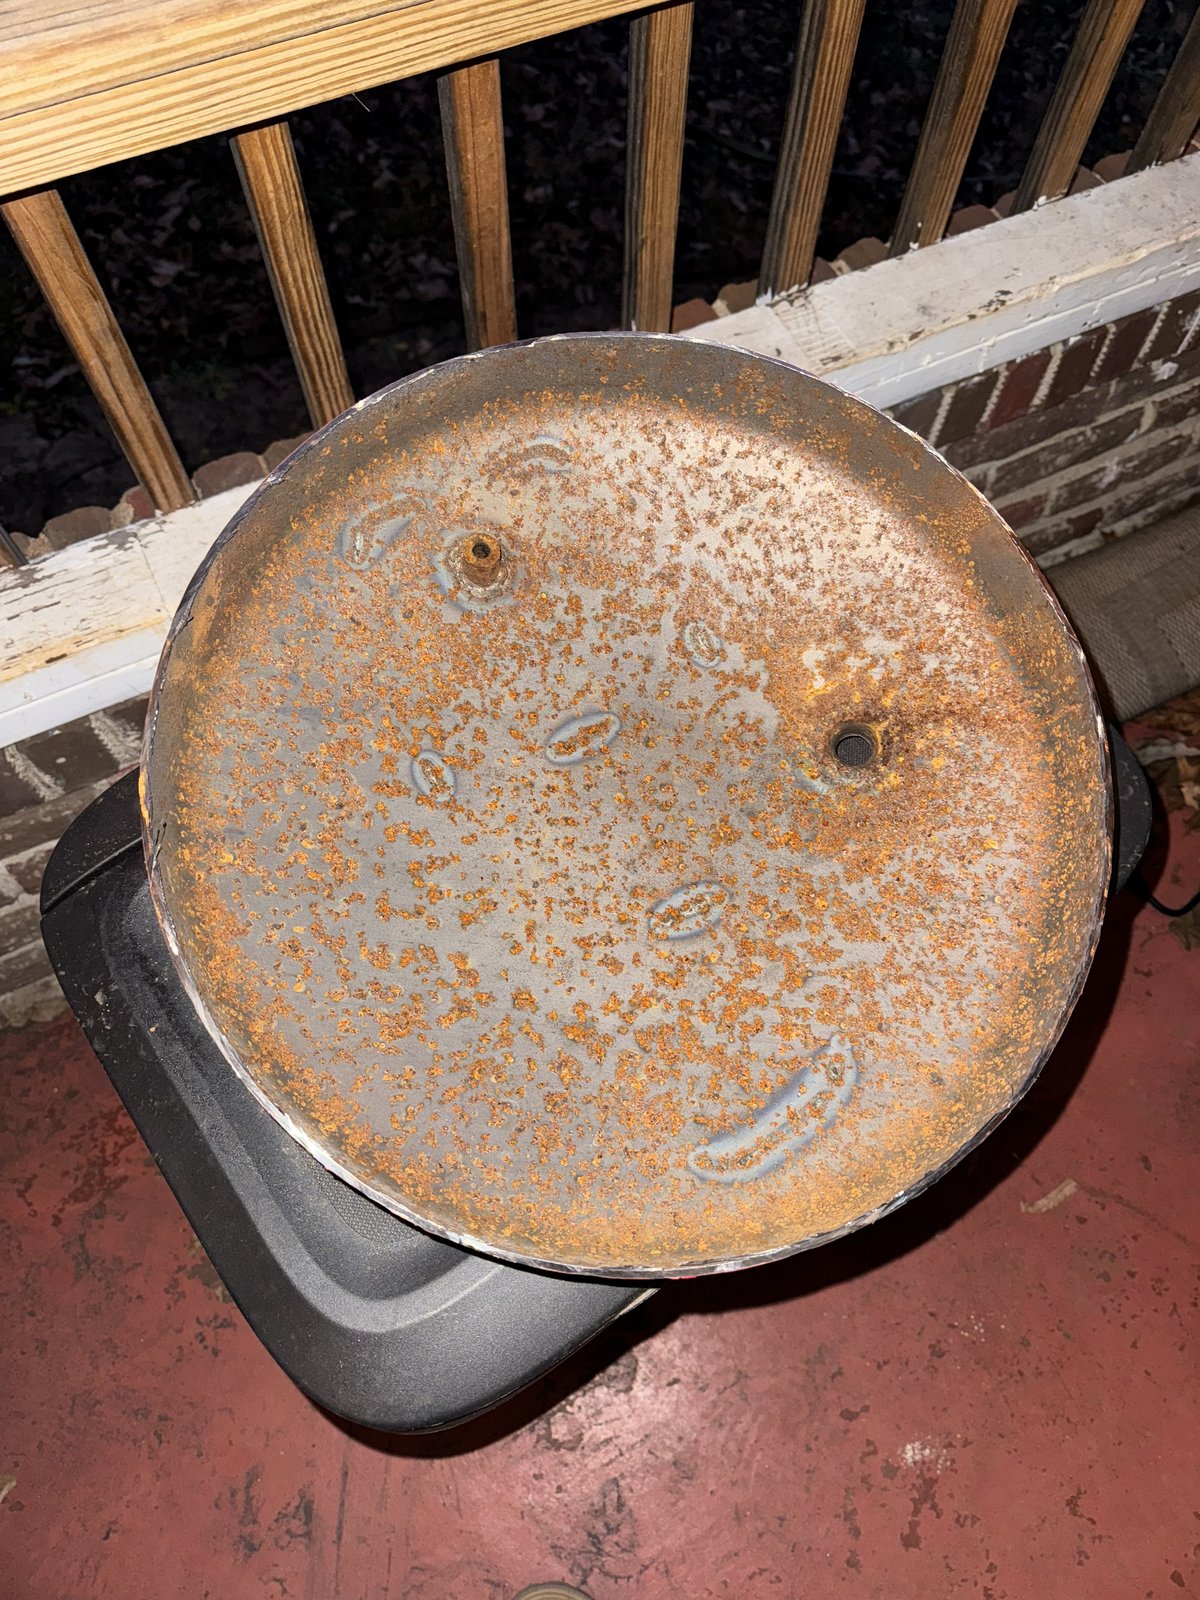
After the lid was removed, I used a large metal file for initial deburring and then did final deburring with a flap disc attachment. I found that the interior of the tank had some surface-level cosmetic rust (potentially from the water fill & drain I did a few days earlier) that I partially removed with a knotted wire cup brush attachment for the angle grinder.
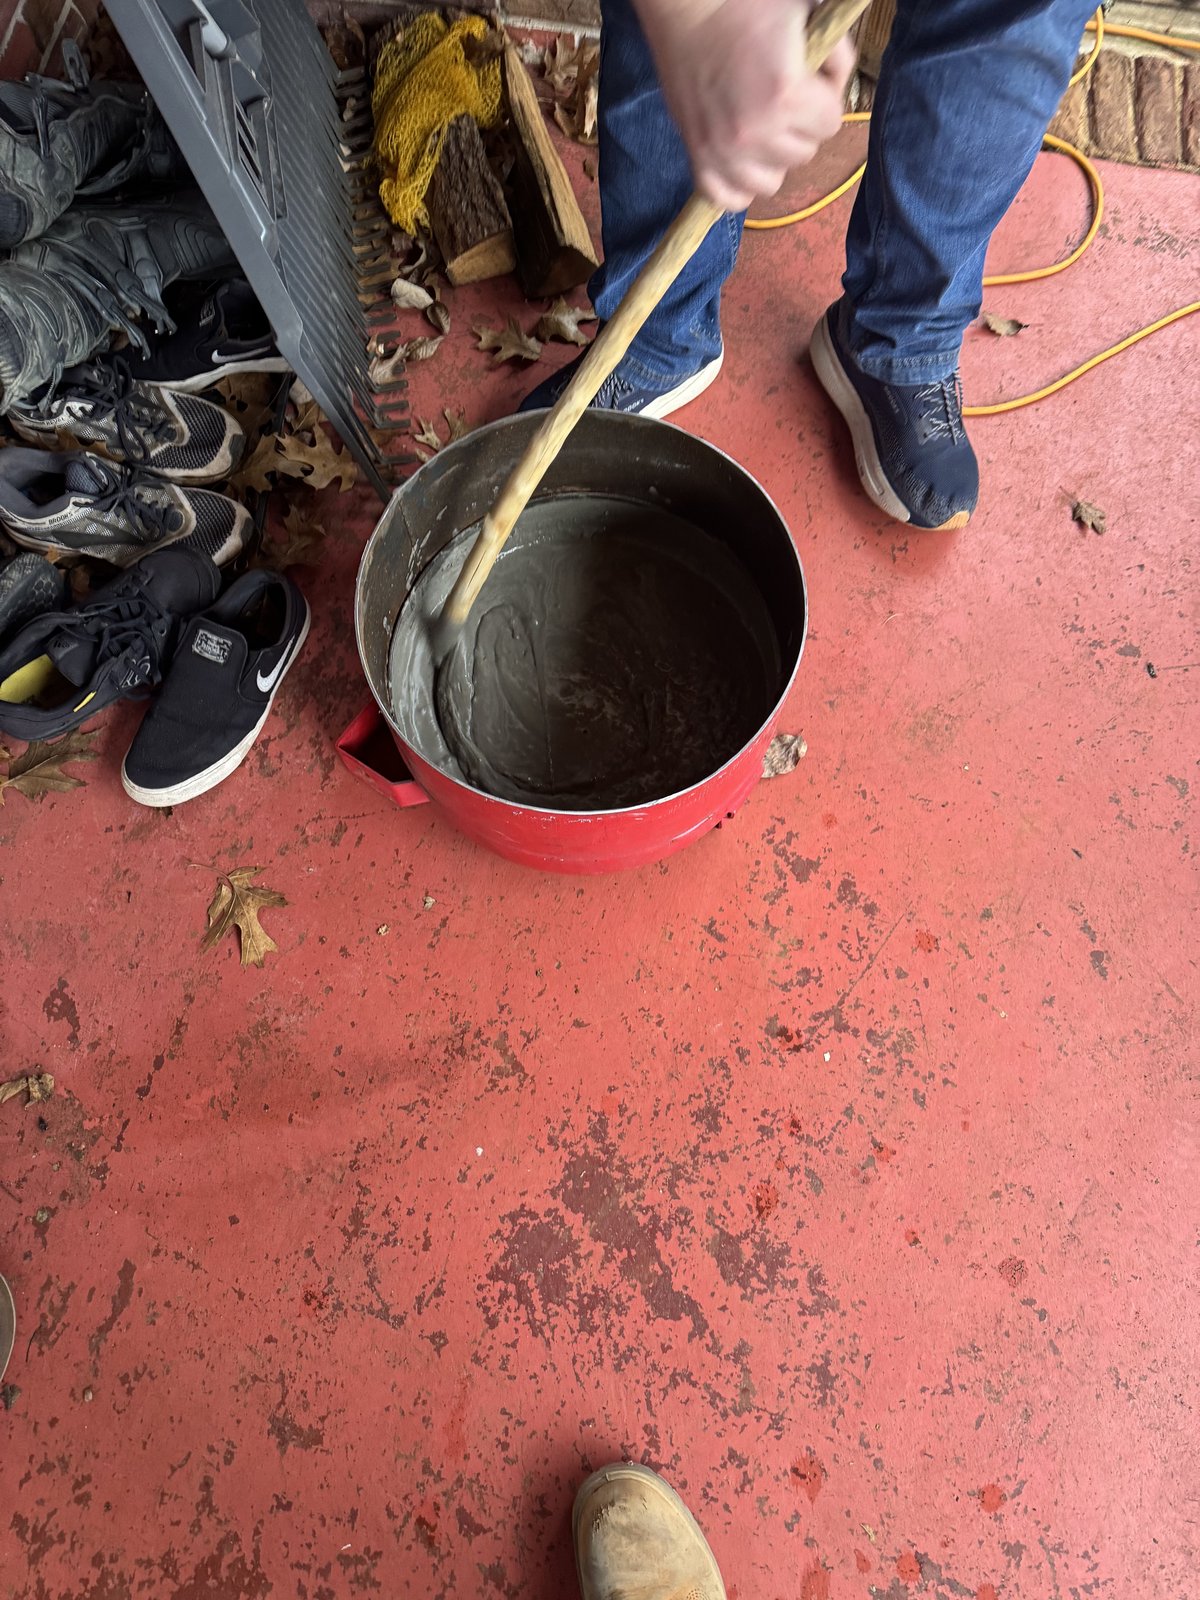
After I made the second cut and removed the middle barrel section, it was time to create the floor of the furnace inside the tank. I planned to use refractory cement to provide a sturdy and level resting place for the crucible. Looking around, the highest temperature rated refractory material I could find was actually mortar, not cement. Looking back, I should’ve just bought refractory cement. Mortar shrinks and cracks as it cures (which it did for me) and is not intended for a multi-inch structural layer. The refractory mortar dry mix was rated to 2550°F, which is technically lower than the propane flame temp, but like I said 2550°F was on the high end of refractory mortar/cement I could find, and the flame would not be aimed directly at the furnace floor. I mixed the refractory mortar directly in the bottom part of the furnace rather than pre-mixing in a bucket. The pour left a large circular crack in the floor. I was disappointed at first but learned that this could actually act as an expansion joint during thermal cycles and would likely fill with ash over repeated use anyway. I used a trowel to flatten the mortar after it was mixed. After a couple of uses, the mortar has held up fine.
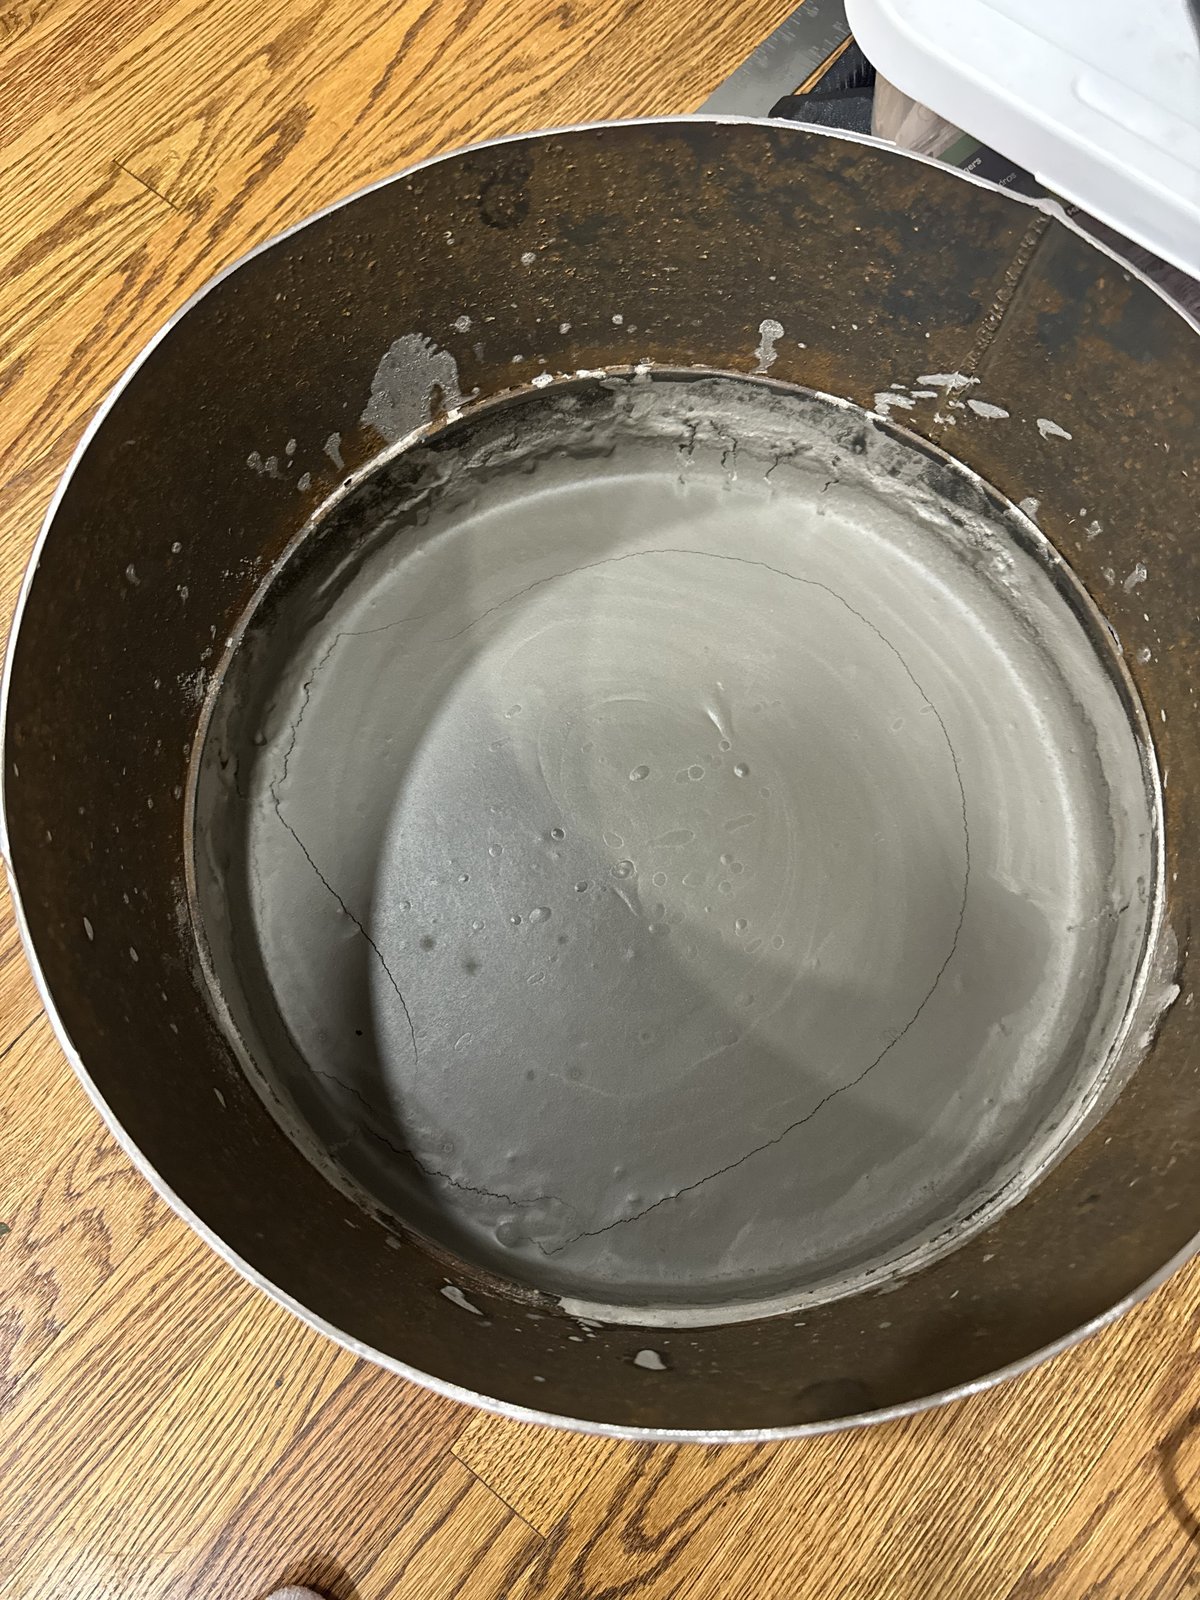
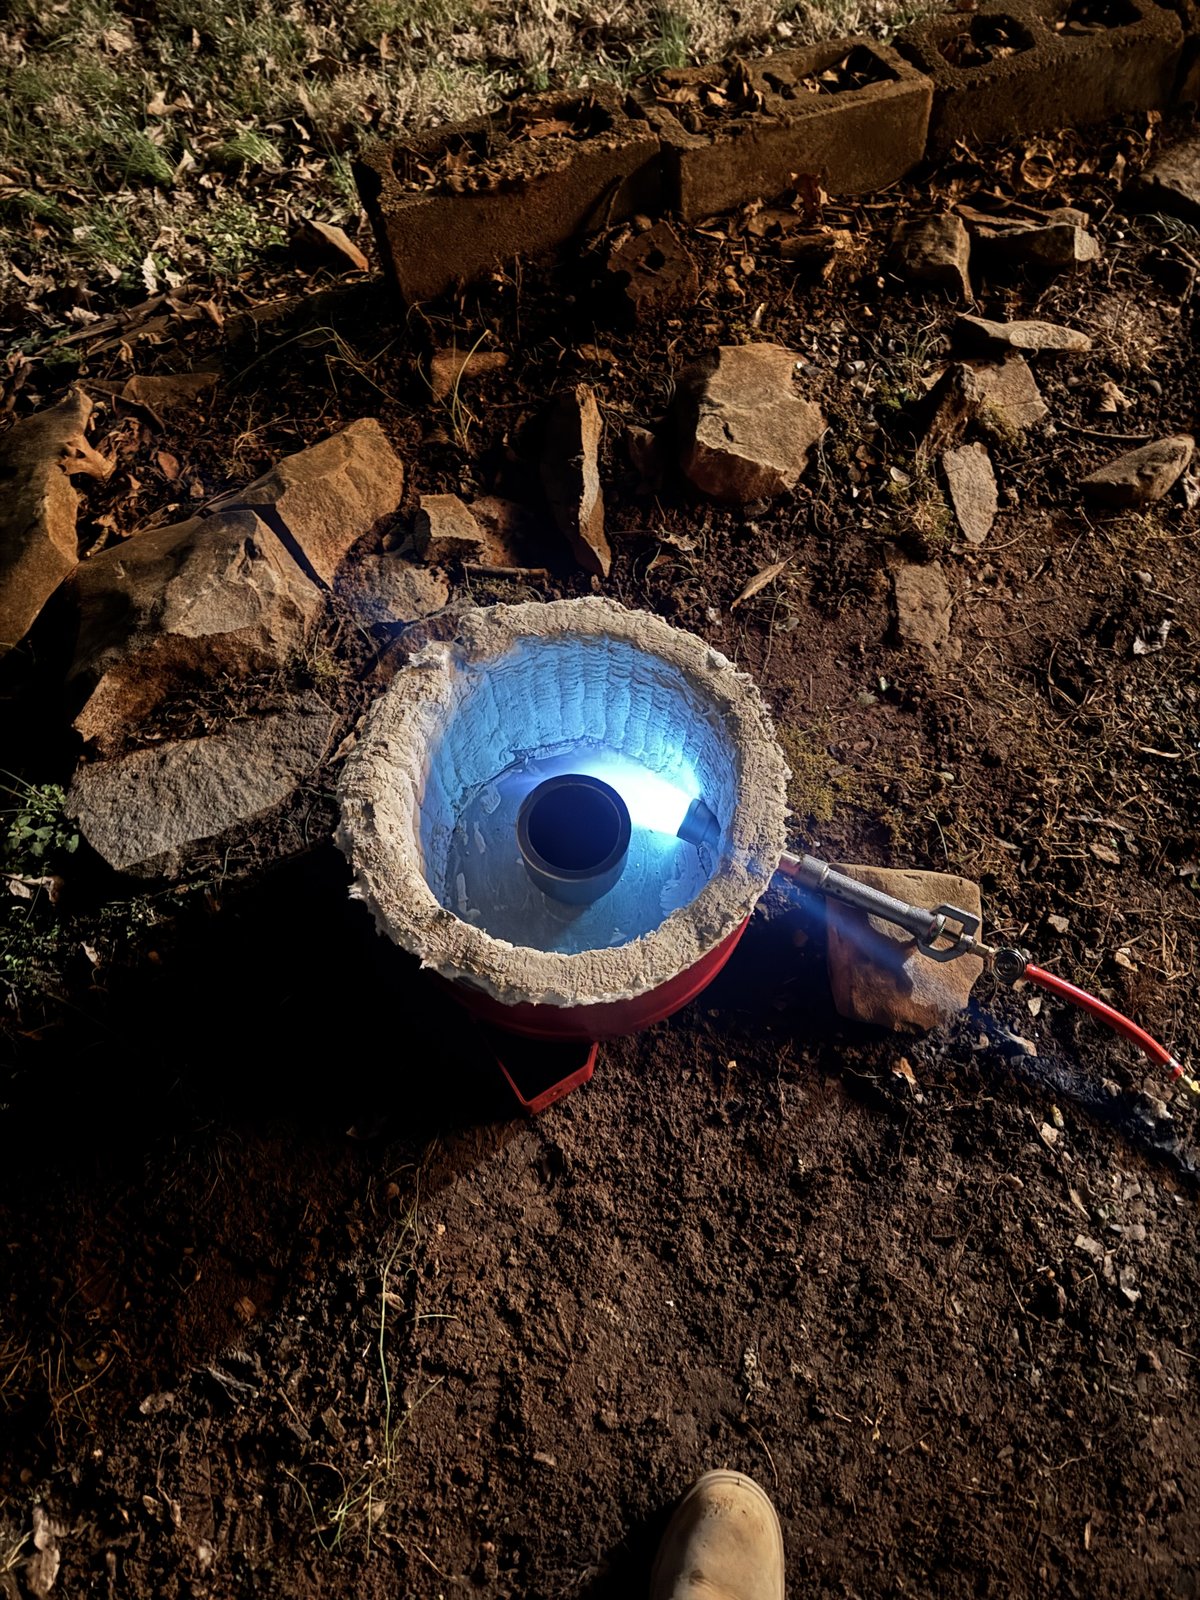
Many DIY designs use refractory cement for both the floor and the walls of the furnace (you can place a wide tube inside the furnace vertically and pour refractory cement outside of it to create refractory cement walls) but I decided to use ceramic wool coated in refractory wash for the walls. The wool has two main advantages over the cement: 1) the refractory cement acts as a heat sink (bad), but the ceramic wool heats quickly and provides insulation for the hot zone and 2) it is lighter.
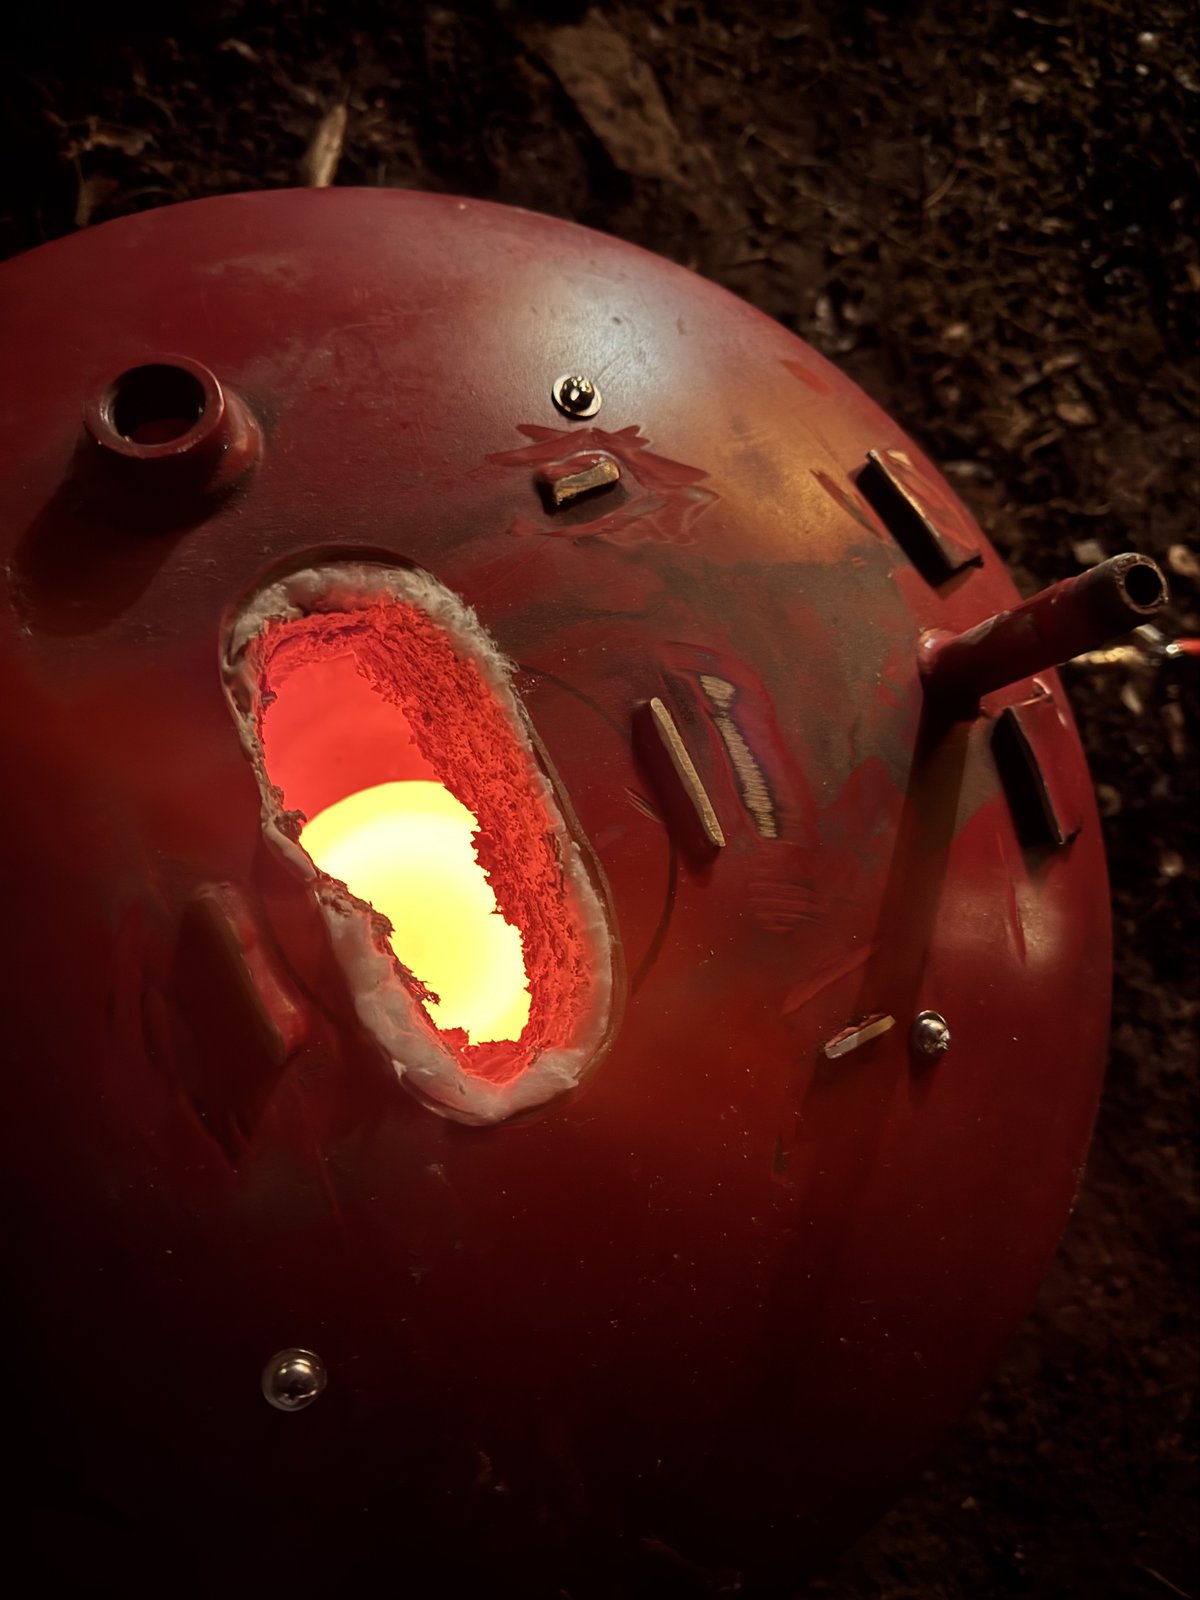
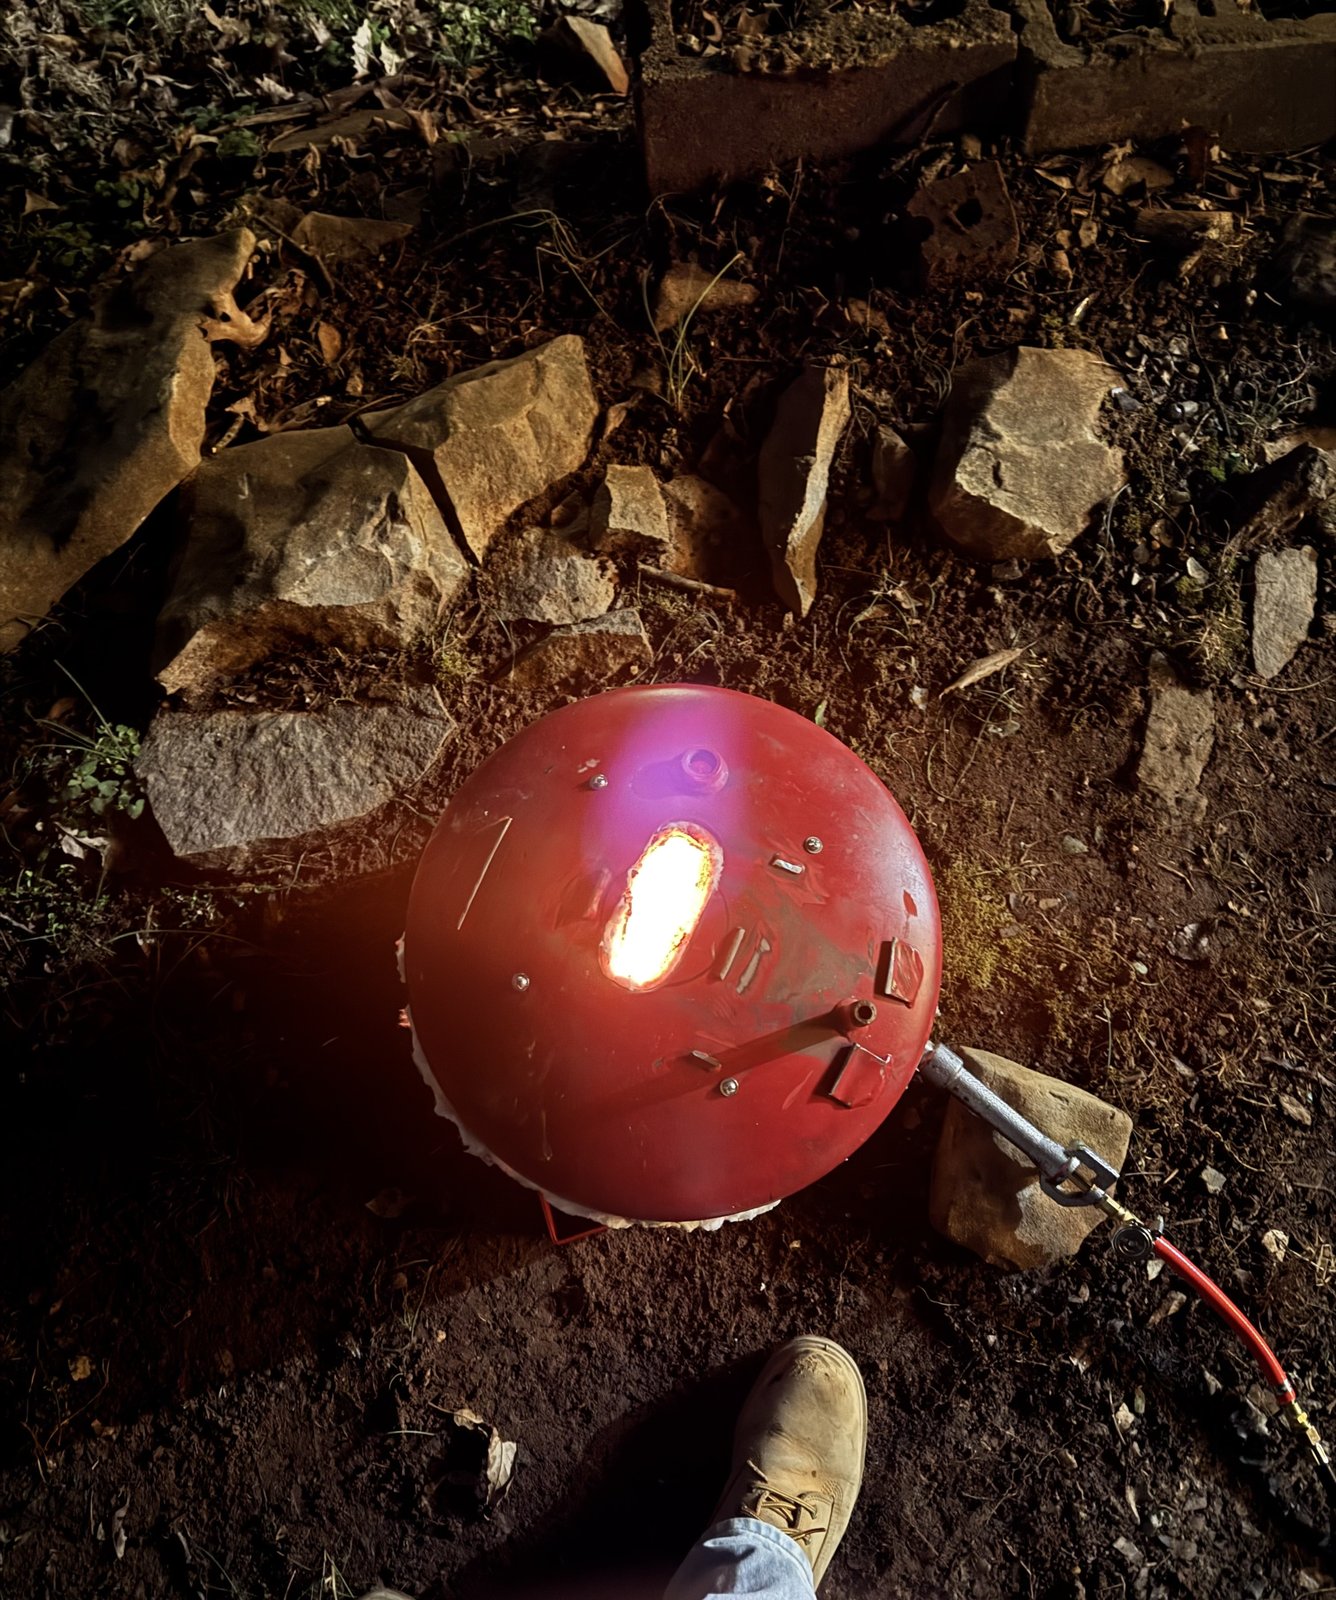
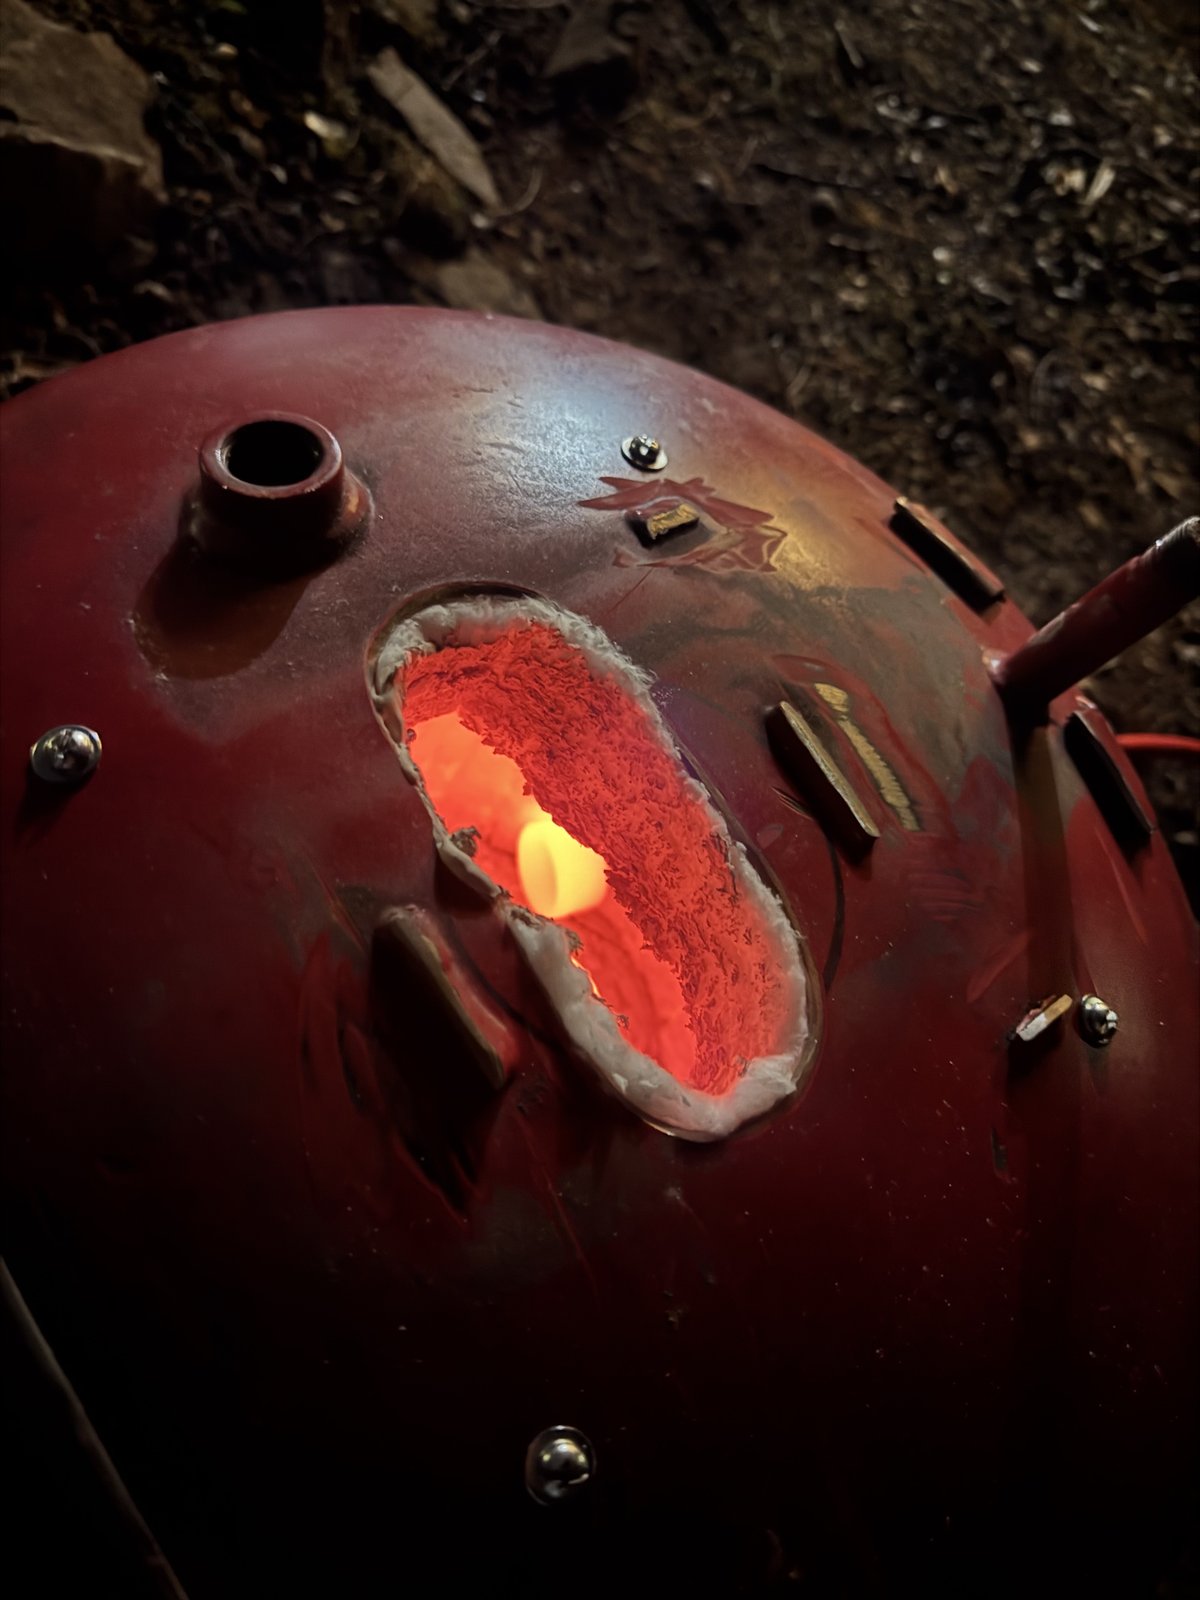
Before I could install the ceramic wool, I needed to add a hole in the side of the furnace body for the propane burner and add a vent at the top of the furnace. An important consideration for the propane burner hole is ensuring that the burner won’t point directly at the crucible. It should be aimed in between the crucible and the furnace wall so that it throws the flame in a swirling direction around the crucible. For vent sizing, the guiding principle is to allow for an exhaust for internal air/gases to prevent pressurization inside the furnace without oversizing the hole so there is excessive heat loss. The general rule of thumb I saw was that the vent hole’s area should be 4x the area of the flow area of the burner-tube. For these holes I bought a Milwaukee Hole Dozer drill bit. The Hole Dozer created a large enough hole for the burner inlet, but because the vent needed to be roughly 12 sq. in., I drilled 2 Hole Dozer holes and angle grinded between them to create an oval-shaped vent.
I could now install the ceramic wool. I cut the ceramic wool using a saw blade on my pocket knife while wearing a respirator. This worked reasonably well. The wool on the sides of the furnace body that formed the wall stayed in place without any fastening, but to secure the wool to the lid I used a couple steel bolts with oversized steel washers. I then covered the wool in a thin layer of refractory wash rated up to 3000°F. The purpose of this refractory wash is to provide protection for the ceramic wool fibers against wear and tear and direct flame contact. The combination of the ceramic wool and the refractory wash definitely helped protect the furnace body during operation. After one use, I found that one spot with a slight gap in wool had burnt off the red paint on the air compressor tank body.
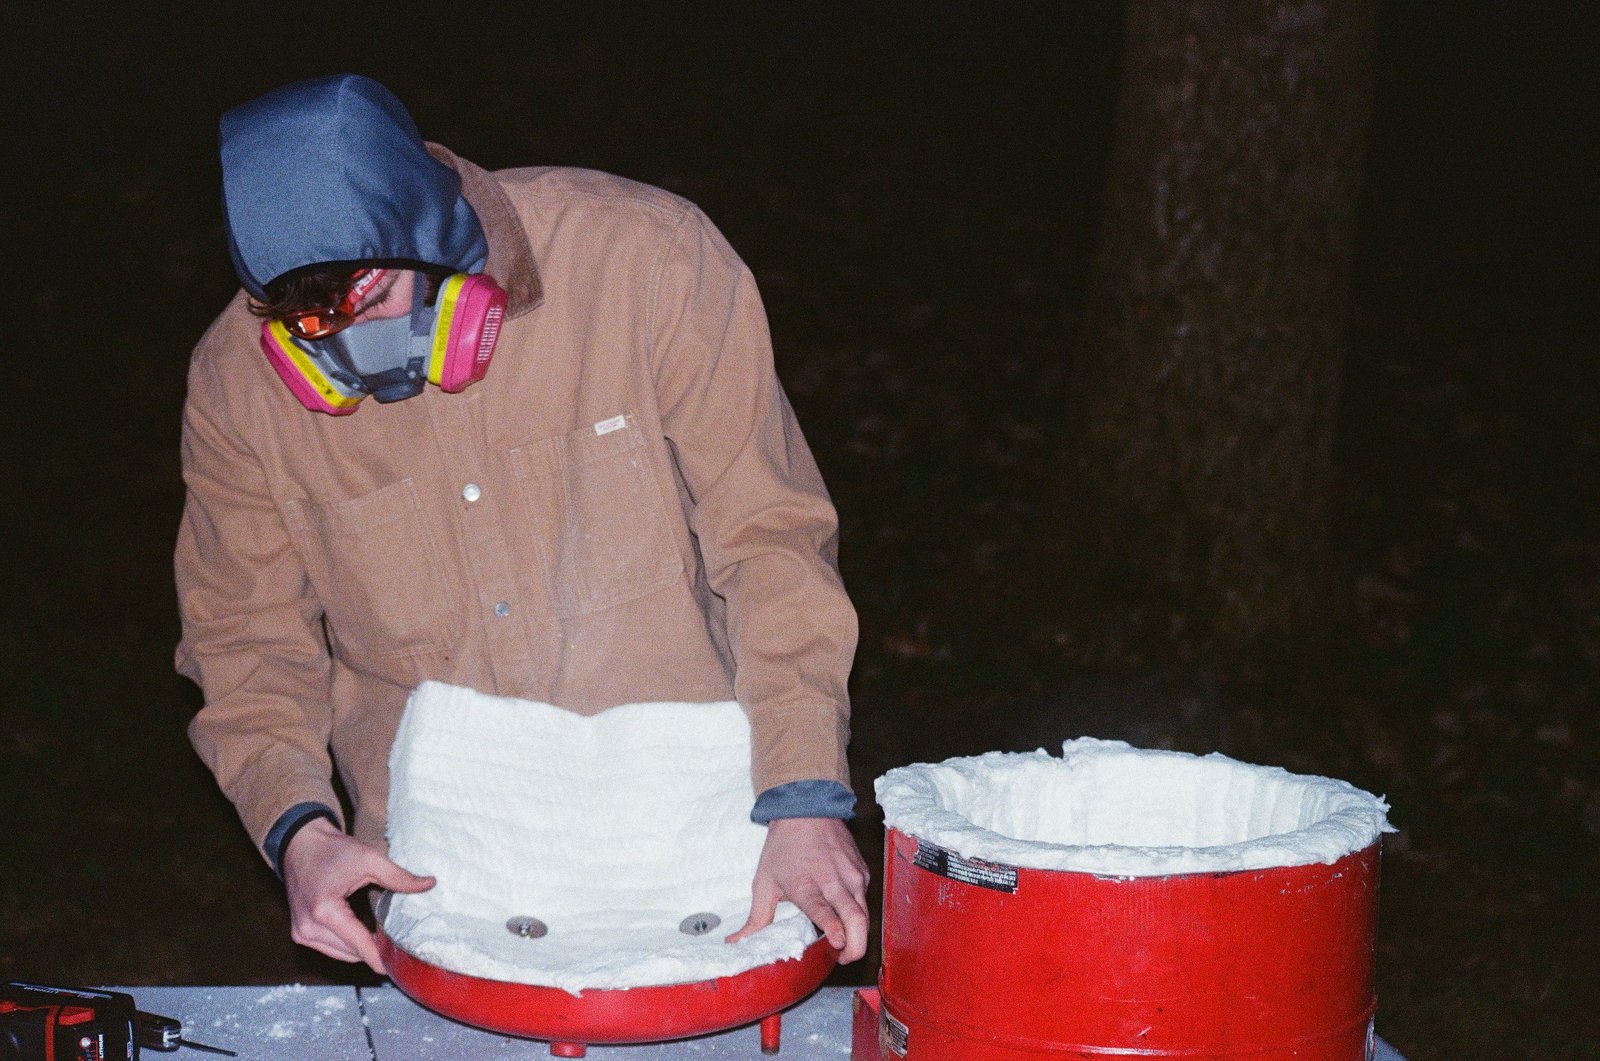
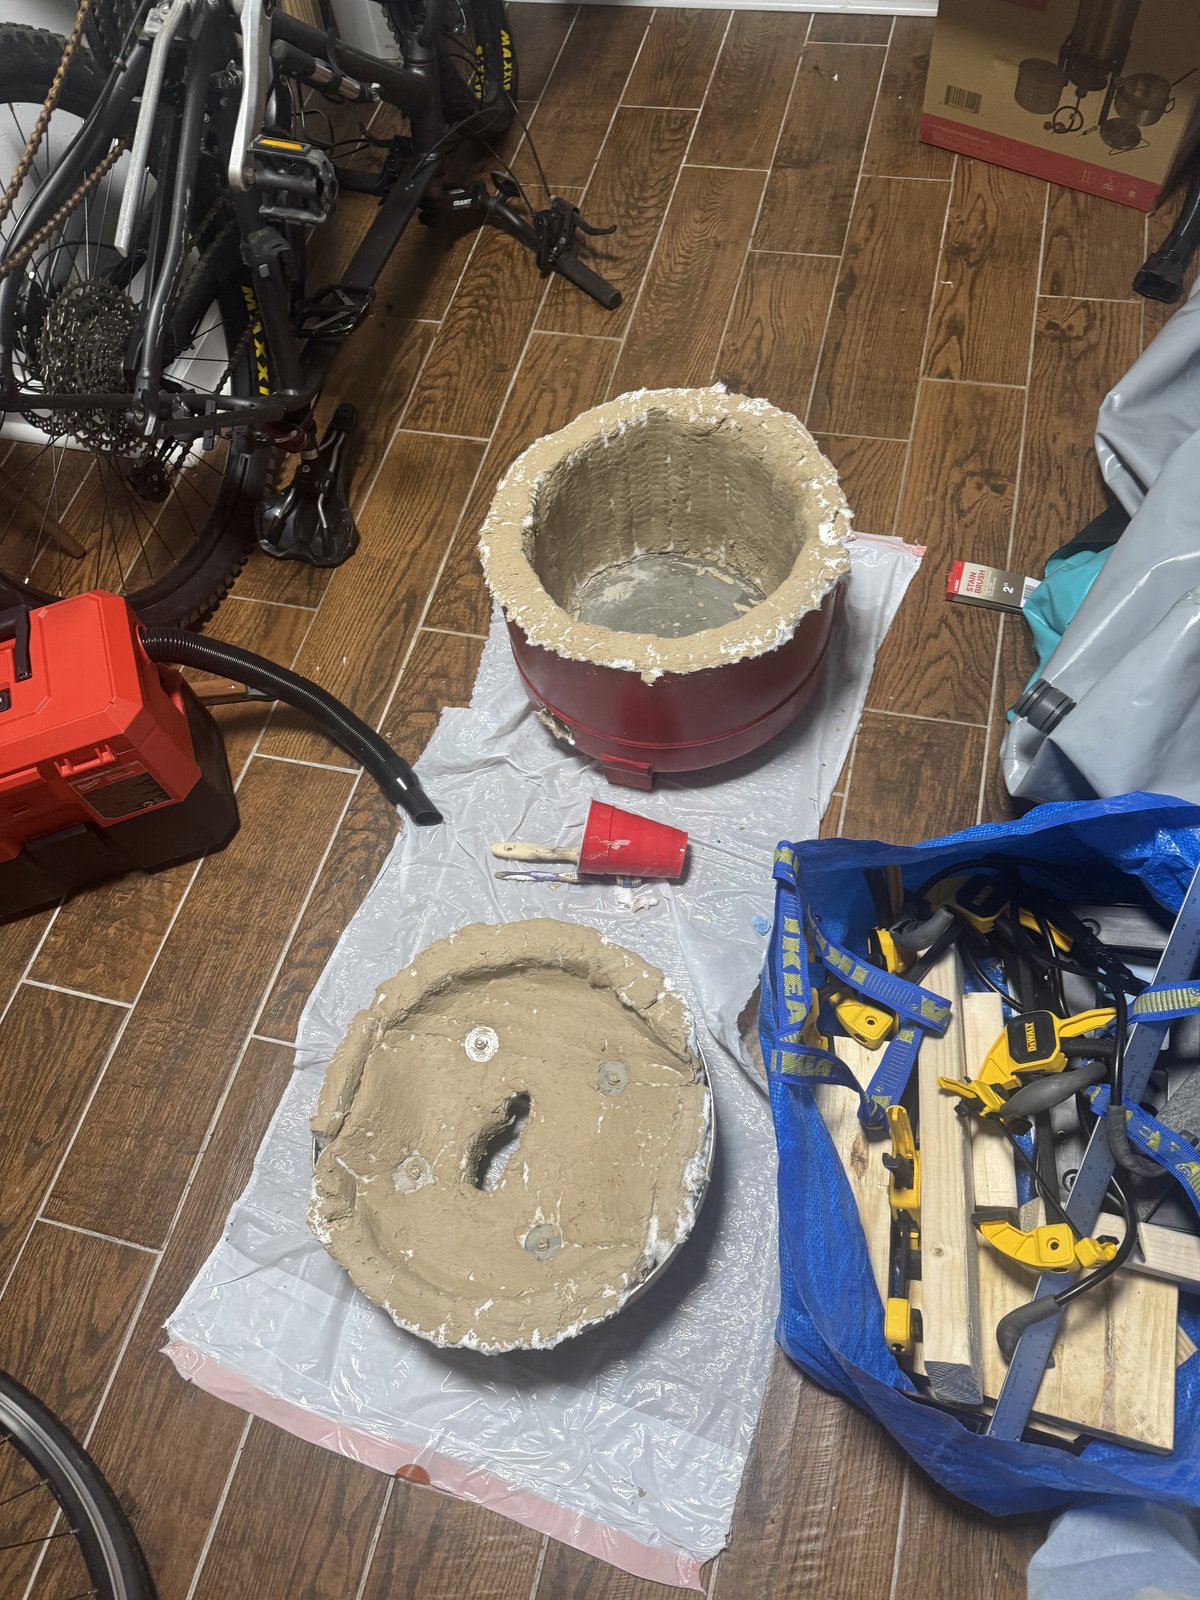
Once the refractory wash had dried, the furnace body build was complete. I was happy with the final weight. All other components (burner, burner tube, crucible, tongs, etc) I bought online. I talk more about them in the Operation & First Cast sections below. I include a list of all materials and tools at the bottom of this post.
From build start to first fire, the project took 49 days (being out of town for Christmas and New Year’s slowed this down a bit) and cost $500 broken out with some loose tool amortization math in the table at the end of this blog.
Operation
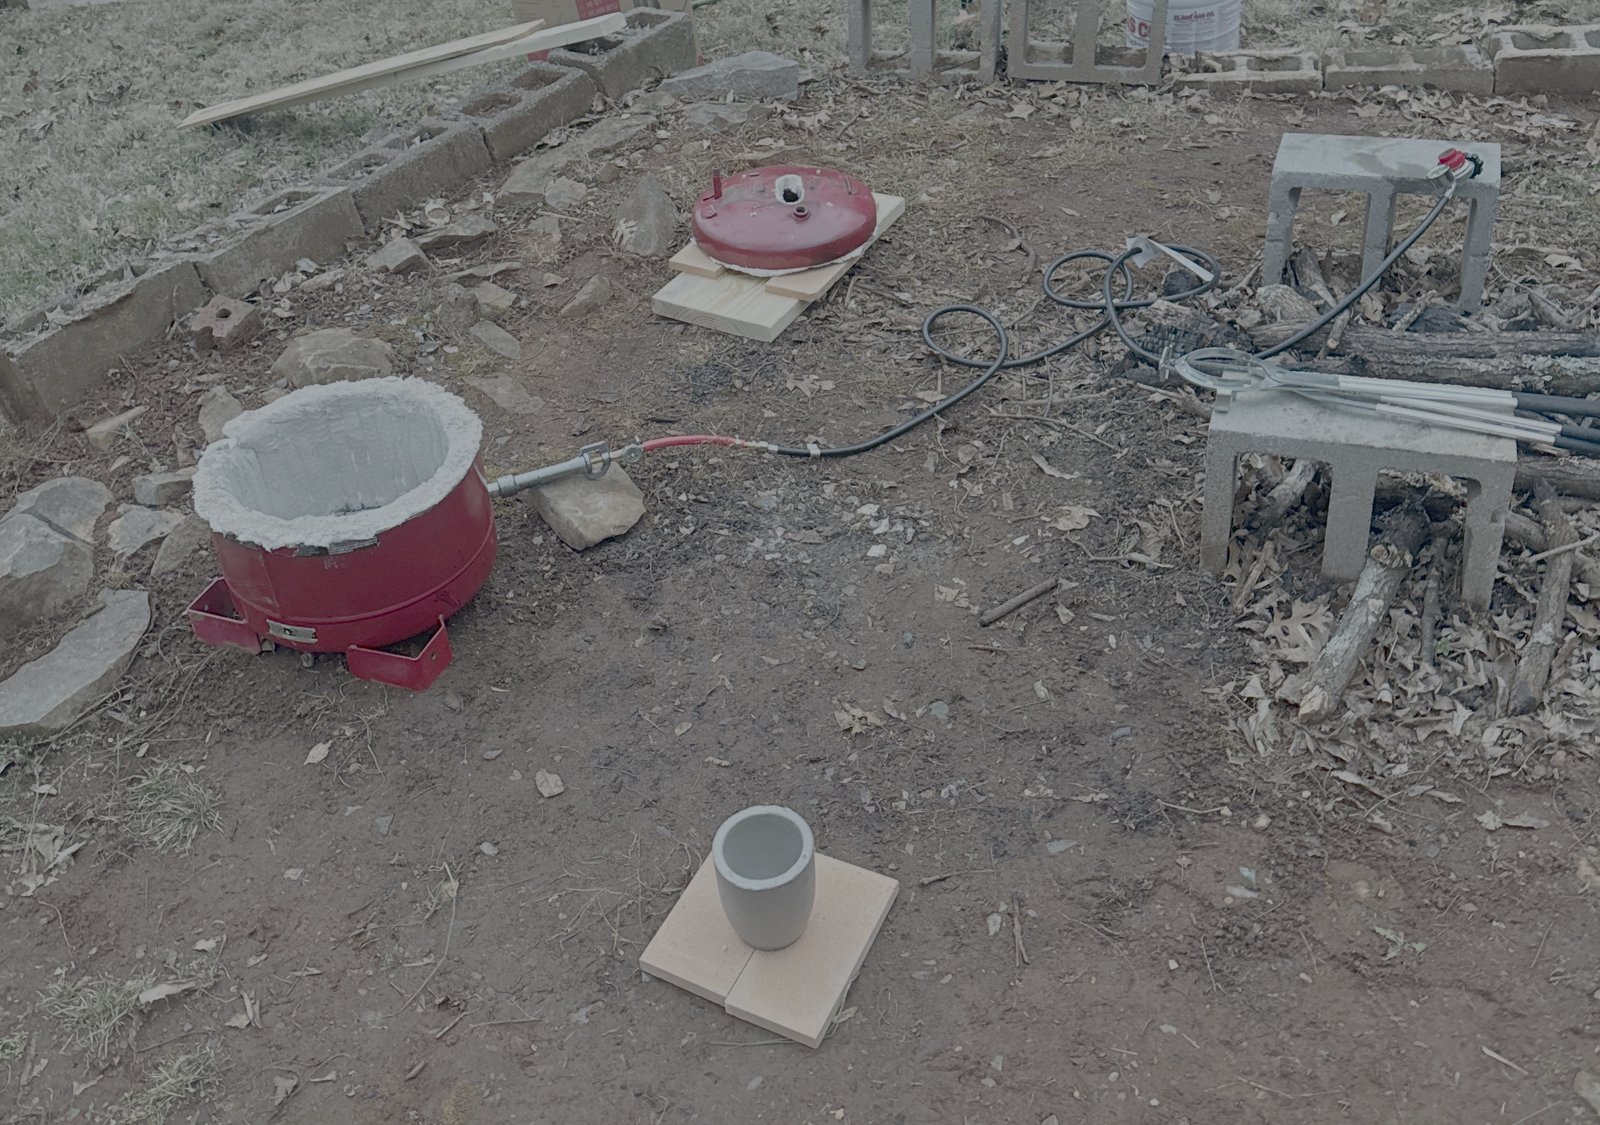
The operation of the furnace consists of the following:
- Setup
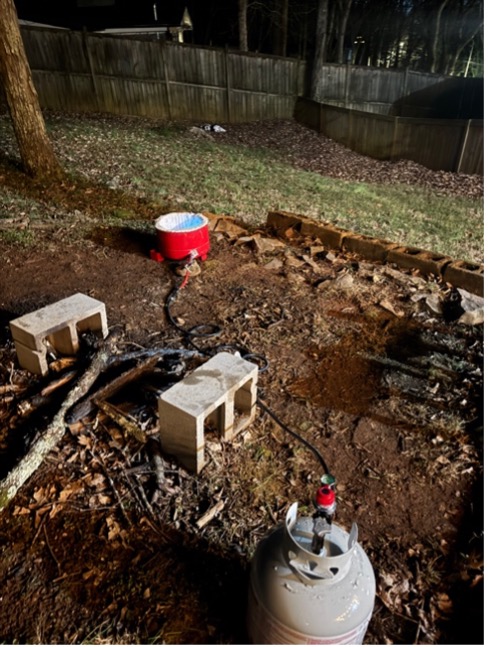
- Attach burner & burner tube to propane tank
- Ensure connections are leak-tight
- Place burner in the furnace
- Place crucible in the furnace with metal inside
- Place refractory bricks in locations for removal of hot lid and hot crucible
- No lid on the furnace at this time
- Attach burner & burner tube to propane tank
- Release minimum amount of propane into the burner (~1-2psi)
- Light burner
- I used a handheld torch
- Place lid on furnace
- Dial in the flame (more on this below)
- Melt metal
- Close propane supply
- Time is precious now. This step could be done after the pour, but it is slightly safer to turn the flame off before the pour.
- Remove lid and place on refractory bricks
- PPE critical at this point forward
- Info on lid removal tools below
- Remove crucible with 1st set of tongs & place on refractory brick(s)
- Grab crucible with 2nd set of tongs and pour metal into mold
- Pour excess molten metal into ingot mold
- Optional, but the alternative is metal will solidify in crucible or you can overfill the mold
- Place crucible on refractory brick
- Remove mold from cast
- I originally thought waiting a couple of hours for the cast to cool down to be on the safe side would be ideal. But after some research it appeared waiting too long could make it hard to remove sand from the cast. Ideal time is material and size dependent. For my first cast (roughly 12” long), the ideal time was about 15-20 minutes before shaking it out of the mold. As with most hot/warm items, you can hover your hand above the cast to get a sense of whether the piece is too hot to touch. Obviously using something like water to increase the cooling speed would act as a quench and should not be done unless a quench is intentional.
Some details on operation:
- Propane Tank Regulator: I originally planned on using a propane tank regulator & tube that I had for my oil fryer, but this ended up being significantly undersized. Most grills supply propane at around 0.4 psi, but my burner required 10+ psi to operate properly. I bought a 0-30 psi adjustable regulator and hose. During operation I open my propane tank and burner valve fully, so all of my fuel control is in this regulator.
- Adjusting Burner Air Inlet: The propane burner I used came with an adjustable air inlet dial that controlled how much air mixed with the propane before combustion. I started with the air inlet mostly closed, lit the burner, then slowly increased the propane and opened the dial until the flame was stable and mostly blue. Once the burner was installed and the furnace heated up, the required setting shifted because the hot chamber and lid vent changed the backpressure through the burner. If the flame started fluttering, whistling, or sputtering, I closed the air inlet slightly and waited a few seconds before making another adjustment. The goal was to use as much air as the burner could handle while keeping the flame firmly anchored and stable.
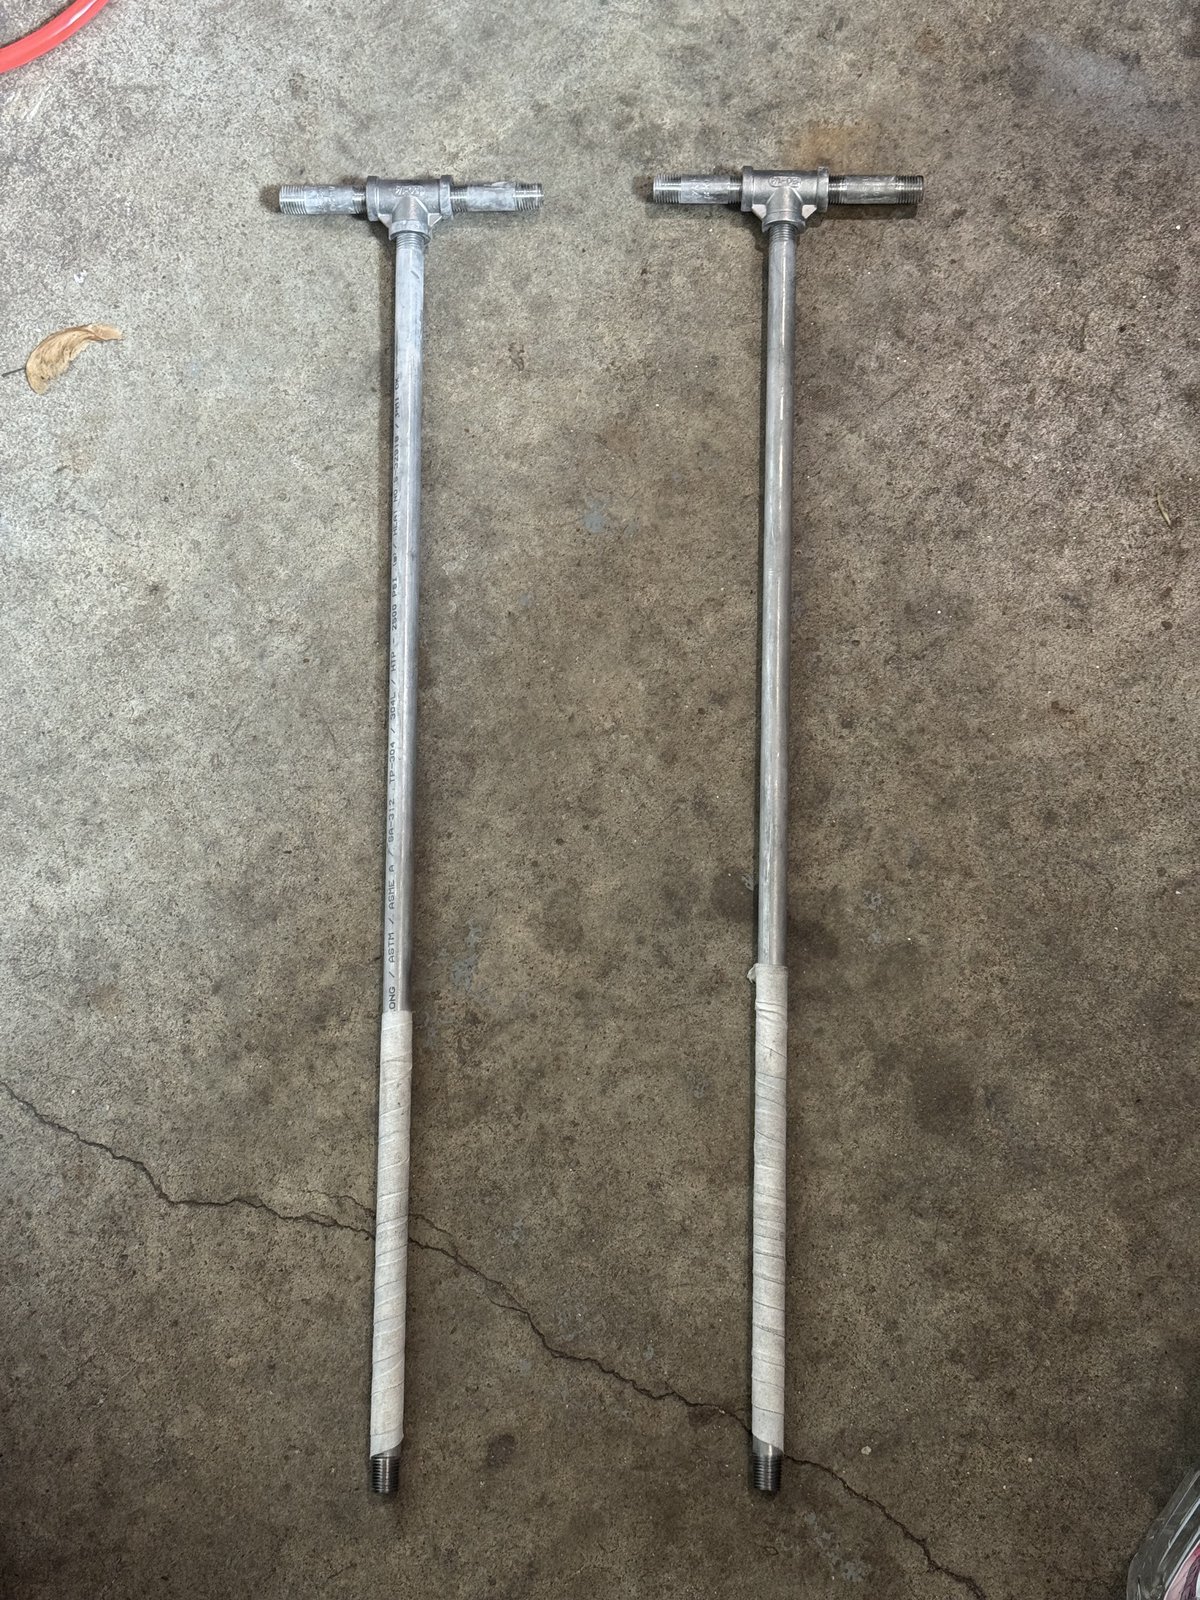
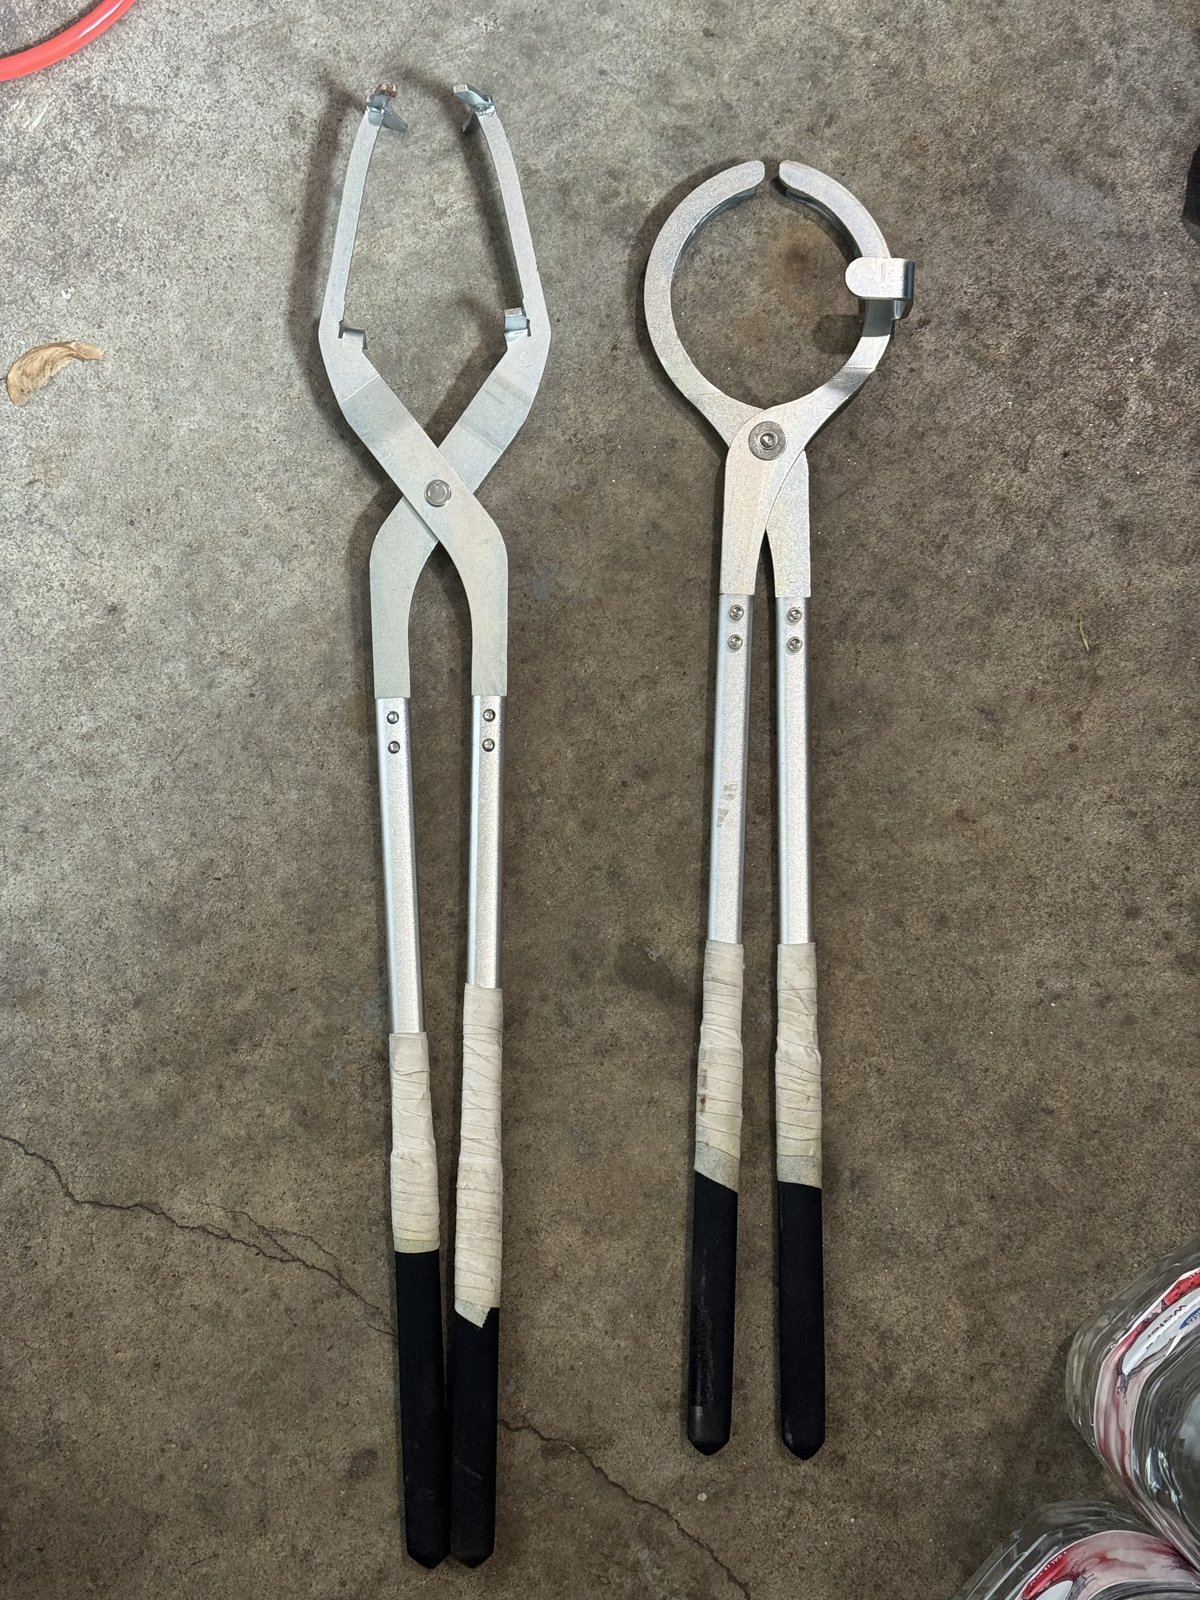
- Lid Removal Tools: My furnace lid removal tools win the award for “Scrappiest Solution” on this project. My original plan was to hinge the lid with a handle, but I was worried about stability of the furnace with the lid hinged open and it meant I would always have to carry the furnace as a single piece, which would be a bit heavier. Instead, I made 2x T-shaped steel lifting tools that would be inserted into the lid vent to lift the lid off of the furnace and place down onto refractory bricks. I made the large T-shaped tools out of 2’ steel pipe with a threaded NPT end, a steel tee, 2x 2” steel pipe nipples, and hockey grip tape. I made 2 of these so the lid could be properly supported during removal. Image below.
- Personal Protective Equipment (PPE): During the pour, I wore safety glasses, face shield, leather jacket, leather gloves, 100% cotton jeans, and leather steel toe boots. It is crucial to wear no synthetic materials.
First Cast
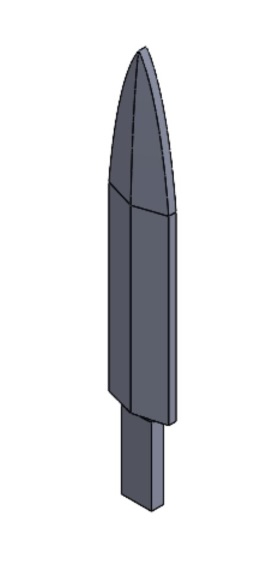
I plan on writing more about casting in future posts, but a brief synopsis of my first cast is that the furnace performed perfectly, but the cast itself did not. I was attempting to cast a small dagger but ended up creating more of a seaweed-looking blob. I chose sand casting as my method as the cheapest and most flexible option. Sand casting (at least in the way I am doing it) involves creating two separable halves of a box filled with sand (top half called cope, bottom called drag), separating them, putting a pattern (a positive in the shape of your desired part) in between them, packing the sand around this shape, removing the pattern, and then pouring into this negative mold. This is seen in the photo below. I used SolidWorks to CAD the dagger to use as the pattern and had my friend Matt 3D print it on his Bambu. I had to iterate on the dagger design a couple times, as the first print looked more like a fat shovel than a dagger. Photo of the final CAD below.
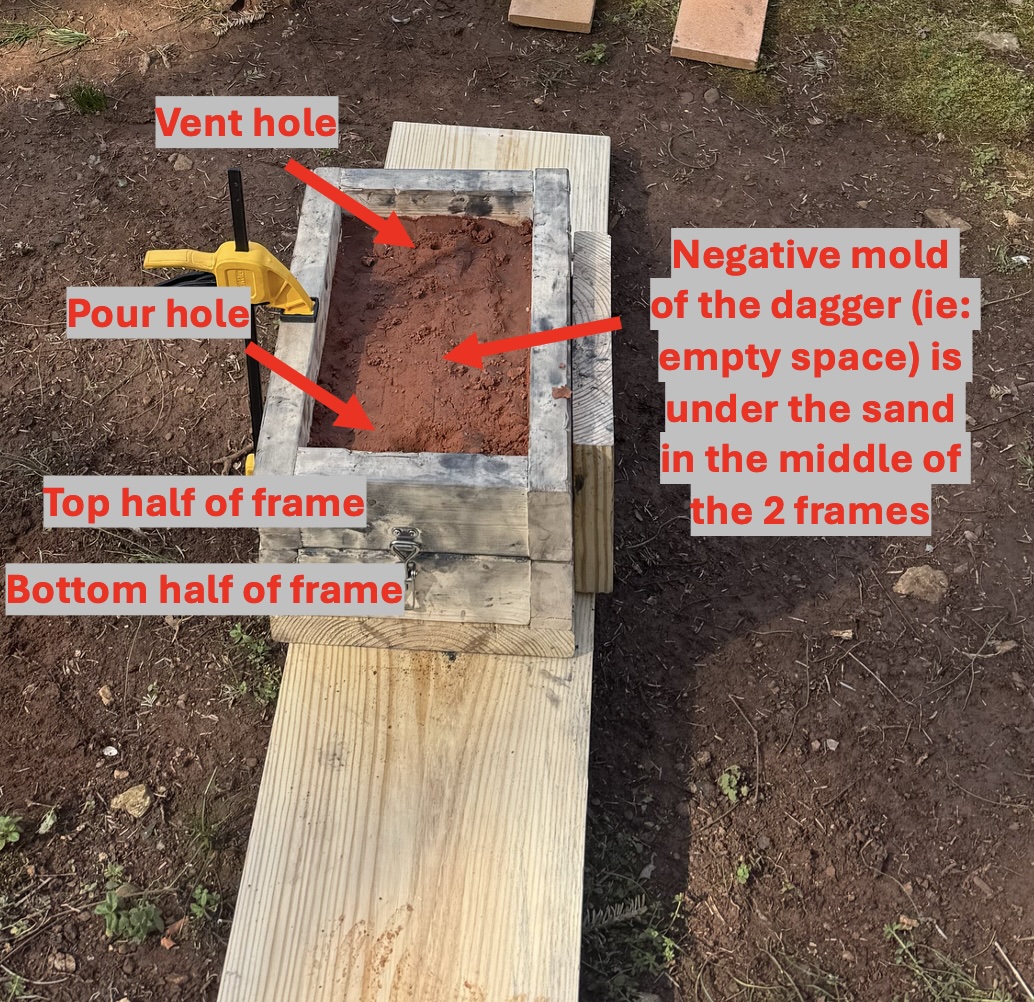
A quick aside on “blowouts” aka my biggest safety concern for this project. A “blowout” is when molten metal shoots out of the gap between the two frames during the pour. It is better watched than described: blowout vid 1 (11:58) blowout vid 2 (5:25). It’s important that anyone doing DIY casting is aware of this possibility and takes appropriate preventative measures. In addition to wearing the PPE I described above, I secured a “gap shield” to one of my frame halves (vertical piece of wood on the right side of the box seen in photo above) so I could pour from that side and should be protected from a blowout. I also used multiple clamps to secure the two frame halves together. I also added a vent hole in the mold to prevent gas pressure build up. Also, during the pour, I positioned my feet away from the gap in the frame as much as I could (specifically away from the lengths of the gap with the thinnest sand between the molten metal and the gap).
The first cast demonstrated furnace success and was a good validation of my processes, but left a lot to be desired on the actual cast. At this point, I believe the cast failed for two reasons: 1) I misplaced the vent hole (the vent hole actually missed the mold completely, venting absolutely nothing) and 2) the sand did not really pack or hold the dagger shape well. The reason venting is important is that as you pour the molten metal into the mold, the trapped air needs a way to escape. If there is no good escape route, it will move against the flowing metal towards the pour hole, creating a turbulent flow. This was evidenced in a large bubble that quickly formed and popped as I was pouring the bronze. I believe the turbulence also caused the large gaps in the cast “dagger” (if you can even call it that). I believe that even if the vent hole was placed properly, the cast would still have come out pretty rough and had many inclusions and surface imperfections. This was because I did not feel confident that the mold shape made in the sand had stayed. It’s like trying to make a tunnel in a sandcastle. I think with more technique research and experimenting I can dial it in, but the first approach just did not feel good. I left 1/8” stock-on material on the cast in order to grind & polish the dagger post-cast knowing that there would be some imperfections in the sand cast, but I do not know if this would have been enough. I don’t want to add more because that blurs the lines between a cast dagger & a dagger shaped from a cast blob/brick of bronze.
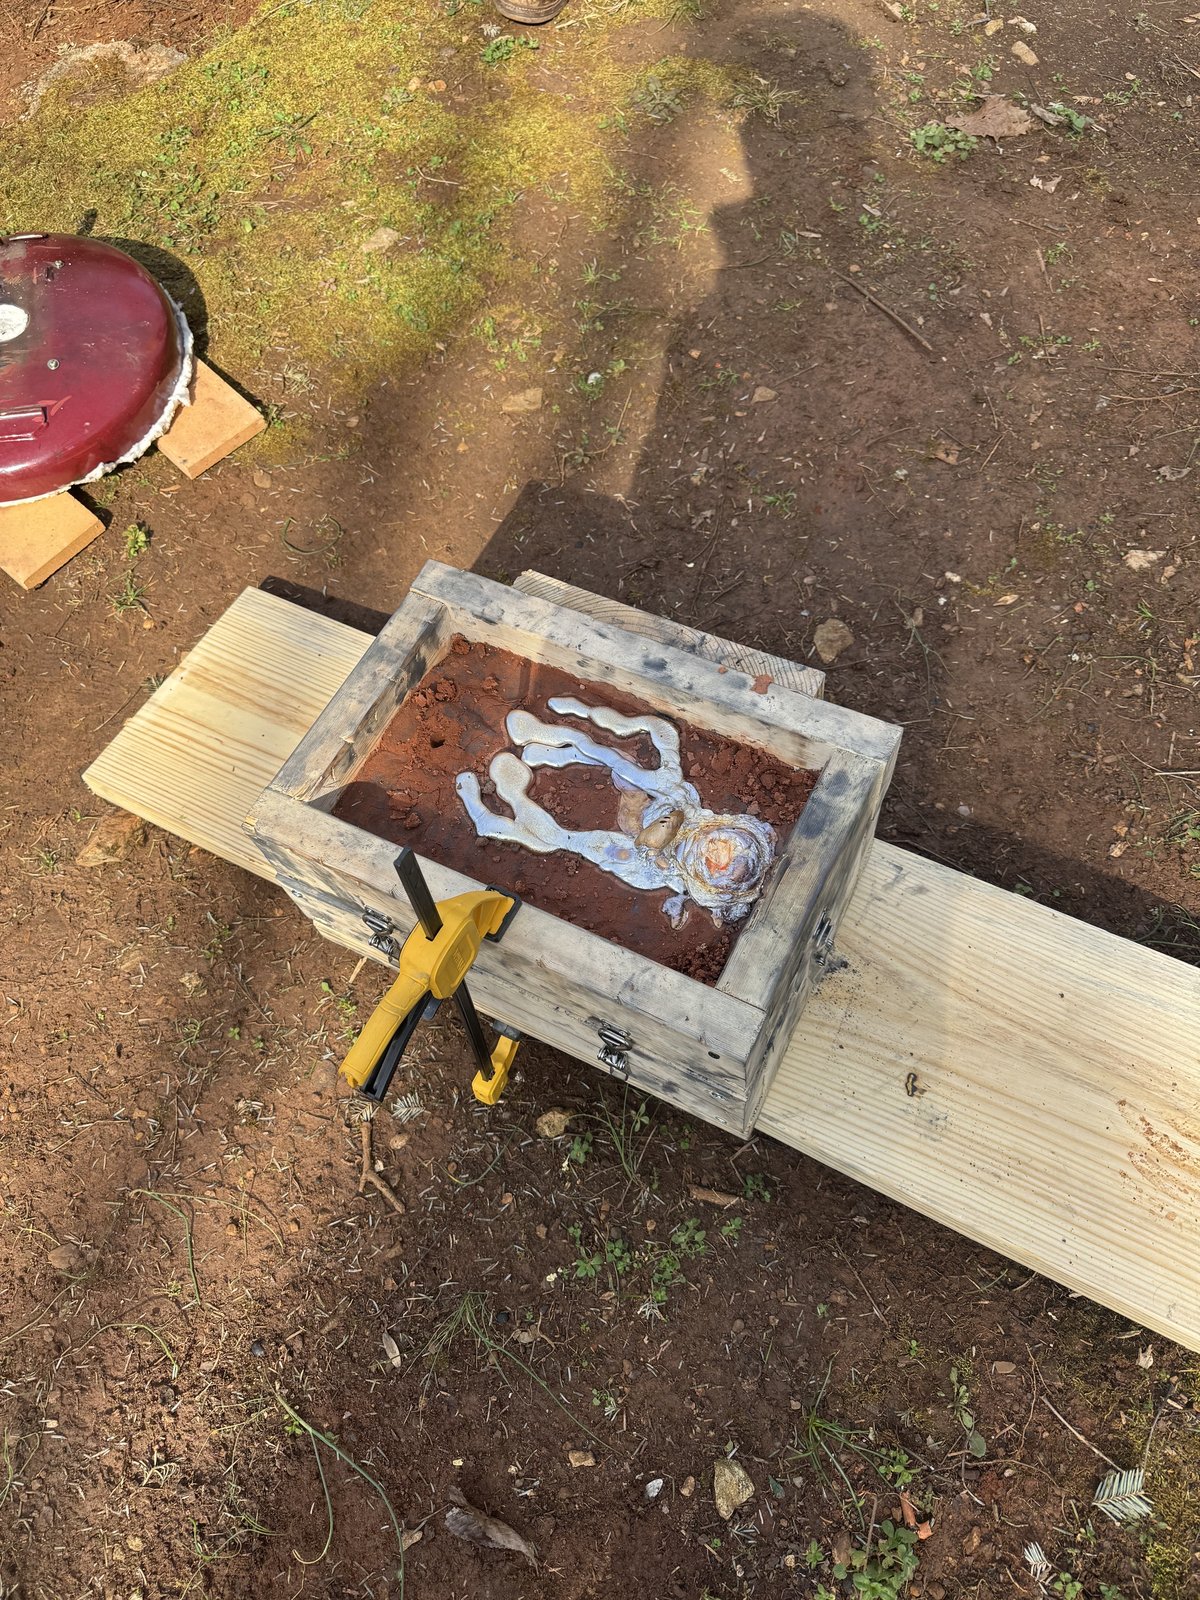
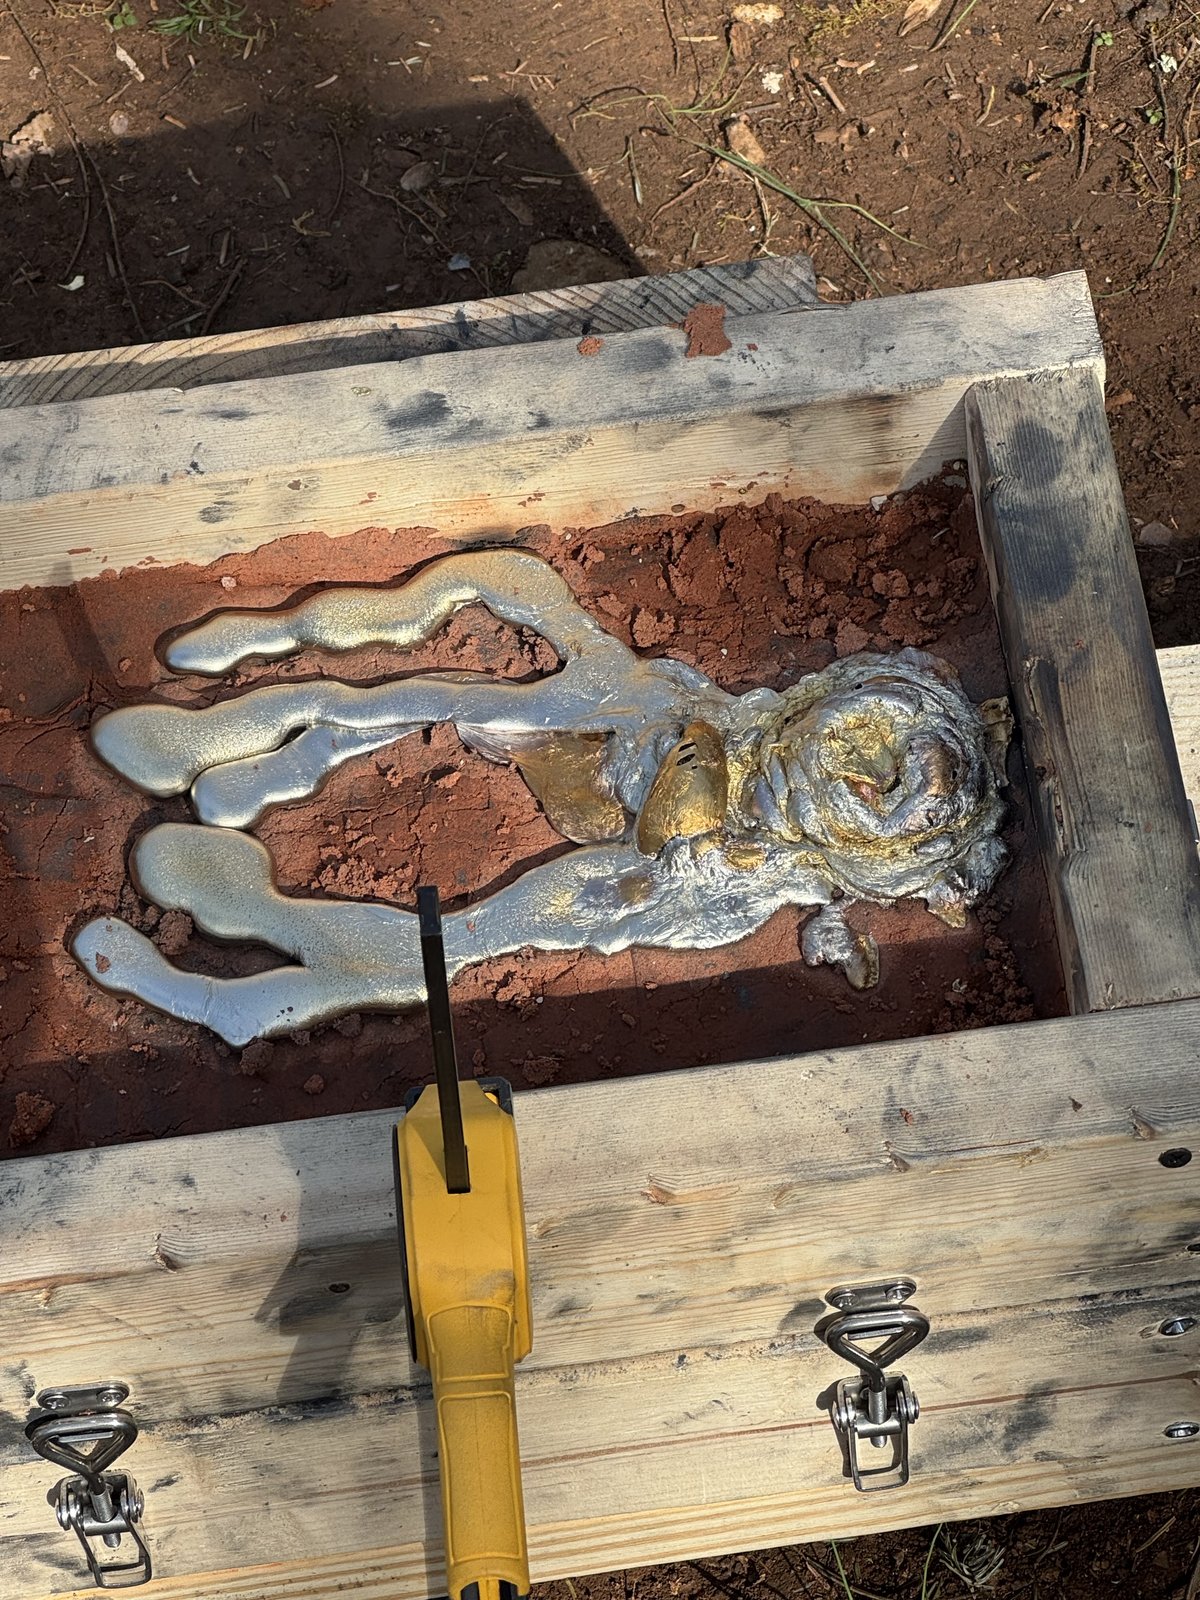
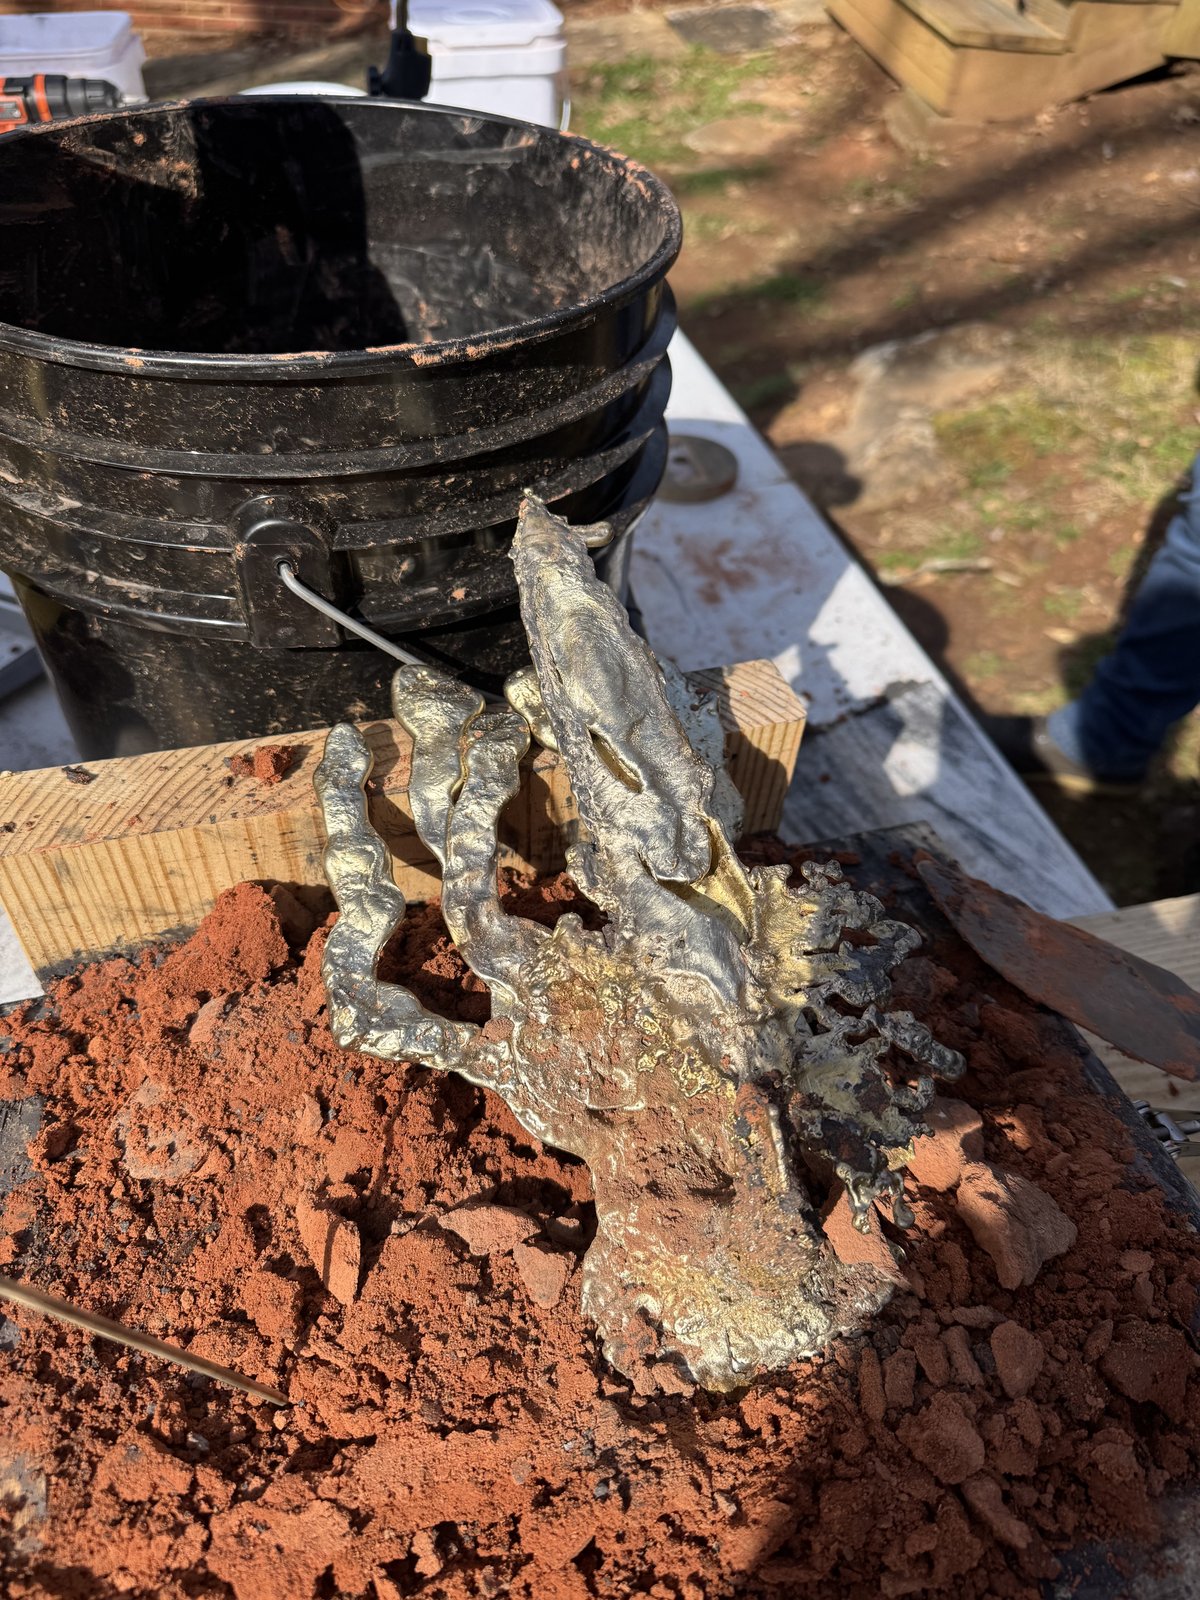
I am keeping my first cast for memories (and maybe to hold one very special book), but next steps are to attempt another cast with a proper vent hole and look into using different sand, techniques, or an altogether different casting method.
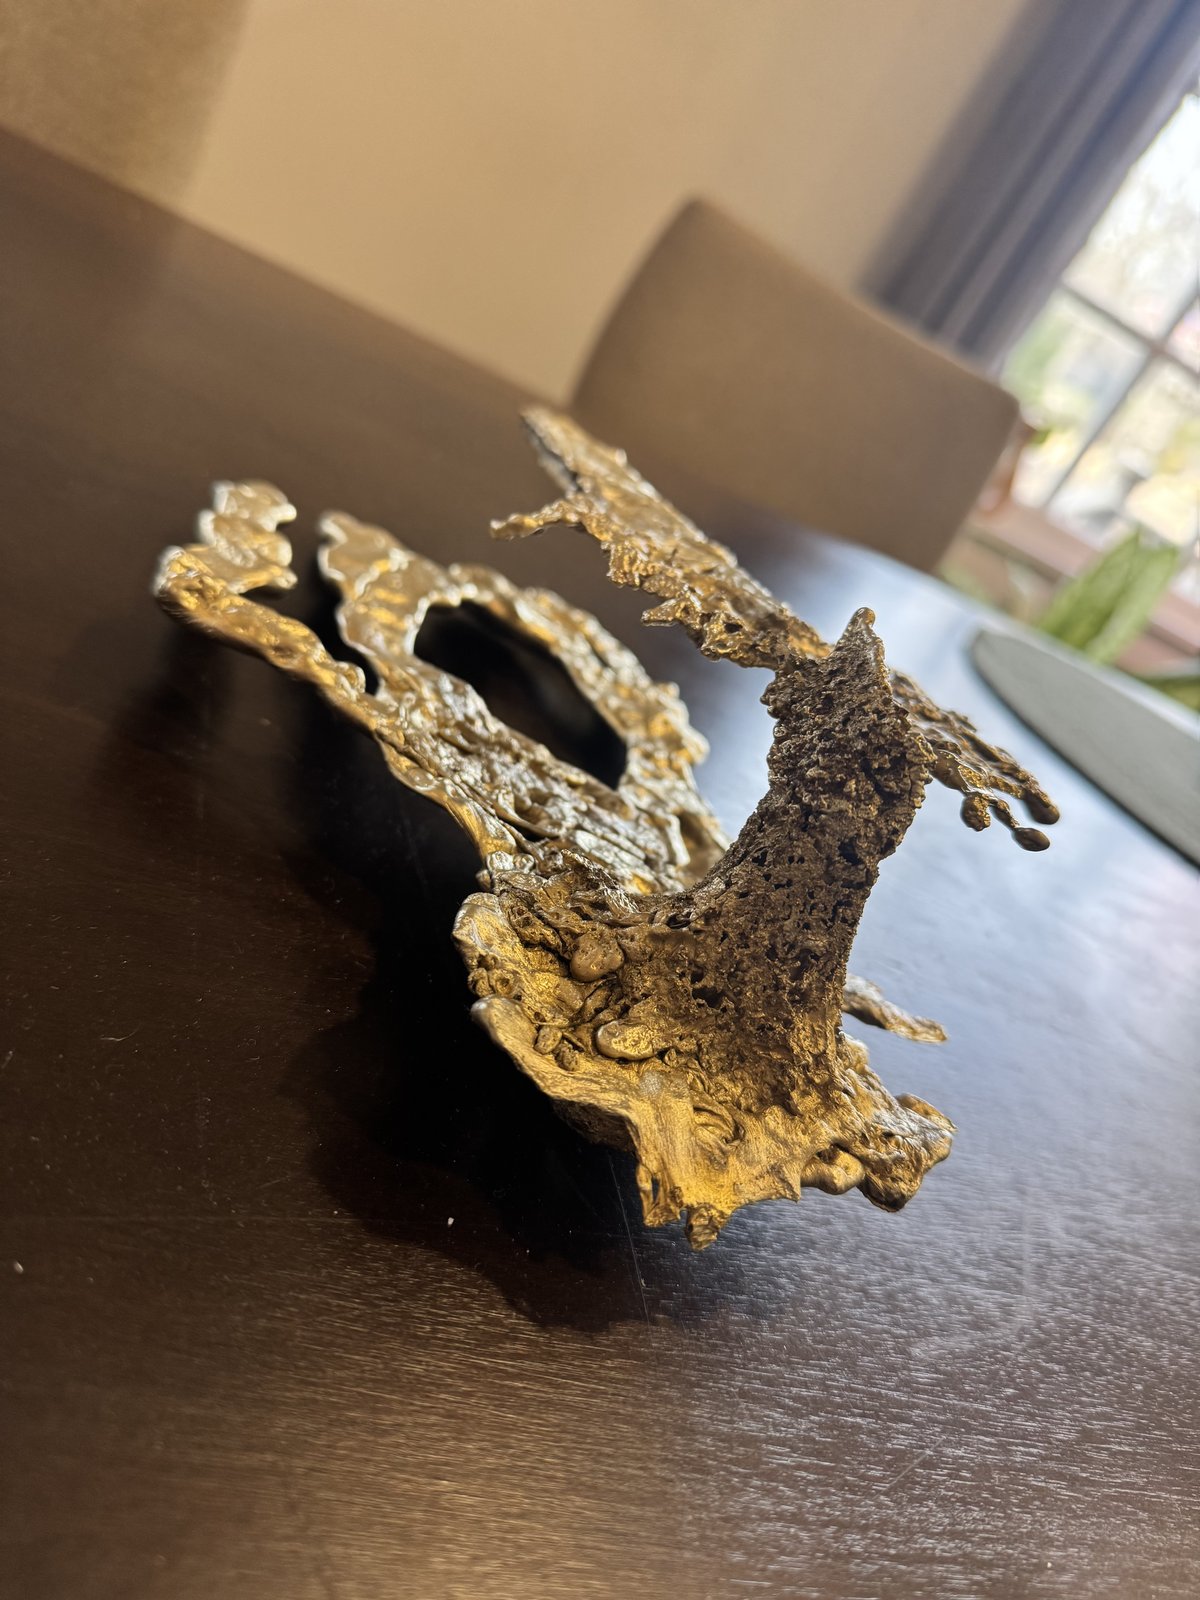
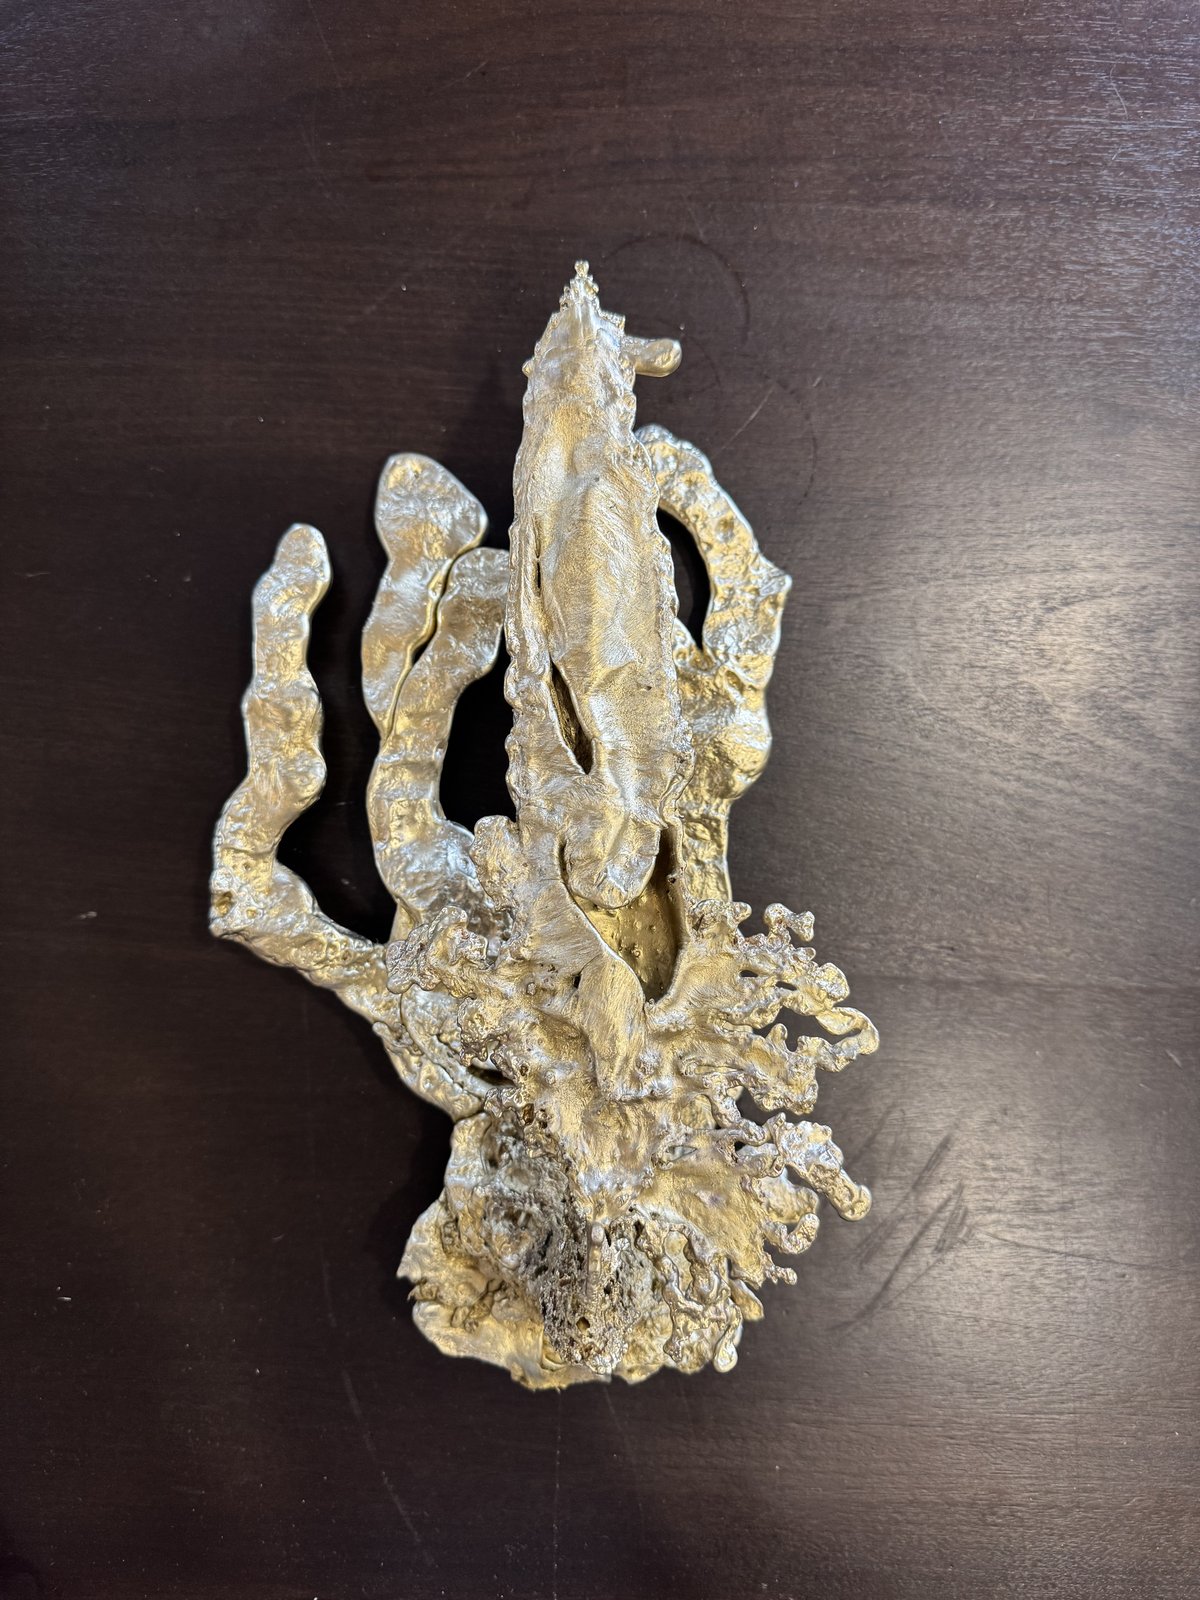
Timeline
Start date: 12/20/25
Finish date: 2/6/26
12/20/25: Received air compressor tank. Filled & drained with water. Began angle grinding. Ordered almost all components.
12/21/25: More angle grinding.
1/10/26: Completed angle grinding. Poured refractory mortar floor.
1/18/26: Drilled burner & vent holes. Cut & installed ceramic wool. Coated ceramic wool with refractory wash.
1/31/26: First burn-in attempted. Failed due to low-pressure regulator. Final component ordered (high pressure regulator & hose).
2/6/26: First burn-in of the furnace!
Cost Breakdown
*Cost for furnace, furnace tools, and PPE only
Material Cost
| Item | Unit Cost | Quantity | Total Cost | Notes |
|---|---|---|---|---|
| Air Compressor Tank | $0 | 1 | $0 | Free from friend |
| Refractory Mortar | $35.0 | 1 | $35.0 | I recommend using cement instead of mortar |
| Refractory Wash | $27.0 | 1 | $27.0 | 5lbs - did not use nearly 5lbs |
| Ceramic Wool (2nd size) | $107.0 | 1 | $107.0 | Bought 2 different sizes and then cut |
| Propane Burner | $38.0 | 1 | $38.0 | |
| 2x crucibles & tongs kit | $82.0 | 1 | $82.0 | 5kg graphite crucibles |
| Bolts (steel) | $0.75 | 4 | $3.0 | |
| Large washers (steel) | $0.5 | 4 | $2.0 | |
| Nuts (steel) | $0.75 | 4 | $3.0 | |
| Hockey Tape | $10.0 | 1 | $10.0 | |
| Threaded pipe nipple (steel) | $3.0 | 4 | $12.0 | |
| Threaded pipe (steel) | $25.0 | 2 | $50.0 | |
| Threaded tee (steel) | $7.0 | 2 | $14.0 | |
| Refractory bricks | $6.0 | 6 | $36.0 | |
| Propane regulator & tube | $24 | 1 | $24.0 | |
| Total | $443 |
Tool Cost
| Item | Unit Cost | Quantity | Total Cost | % of Total Life Used | "Amortized Cost" | Notes |
|---|---|---|---|---|---|---|
| Angle Grinder | $35.0 | 1 | $35.0 | 5% | $1.8 | |
| Hearing Protection Earmuffs | $22.0 | 1 | $22.0 | 5% | $1.1 | |
| Holedozer Drill Bit | $21.0 | 1 | $21.0 | 100% | $21.0 | Broke after a couple uses :( |
| Drill | $49.0 | 1 | $49.0 | 5% | $2.5 | |
| Paint Brush | $3.0 | 1 | $3.0 | 100% | $3.0 | For applying the refractory wash |
| Respirator | $36.0 | 1 | $36.0 | 20% | $7.2 | |
| Cut-Off Disc (Angle Grinder) | $1.0 | 2 | $2.0 | 100% | $2.0 | |
| Low-Grit Flap Disc (Angle Grinder) | $5.0 | 1 | $5.0 | 100% | $5.0 | |
| Grinder brush kit (7pc) | $35.0 | 1 | $35.0 | 10% | $3.5 | |
| Safety Glasses | $1.0 | 1 | $1.0 | 1% | $0.0 | |
| Face Shield | $41.0 | 1 | $41.0 | 10% | $4.1 | |
| Leather Gloves | $25.0 | 1 | $25.0 | 10% | $2.5 | |
| Metal File | $4.0 | 1 | $4.0 | 10% | $0.4 | |
| Trowel | $5 | 1 | $5.0 | 50% | $2.5 | |
| Total | $57 |